Lab 6 - Site2Cloud#
1. SCENARIO#1#
ACE’s OnPrem Data Center has recently hired a new network engineer.
You have been engaged for activating the “Route Approval” feature in order to protect the MCNA from unauthorized advertisements.
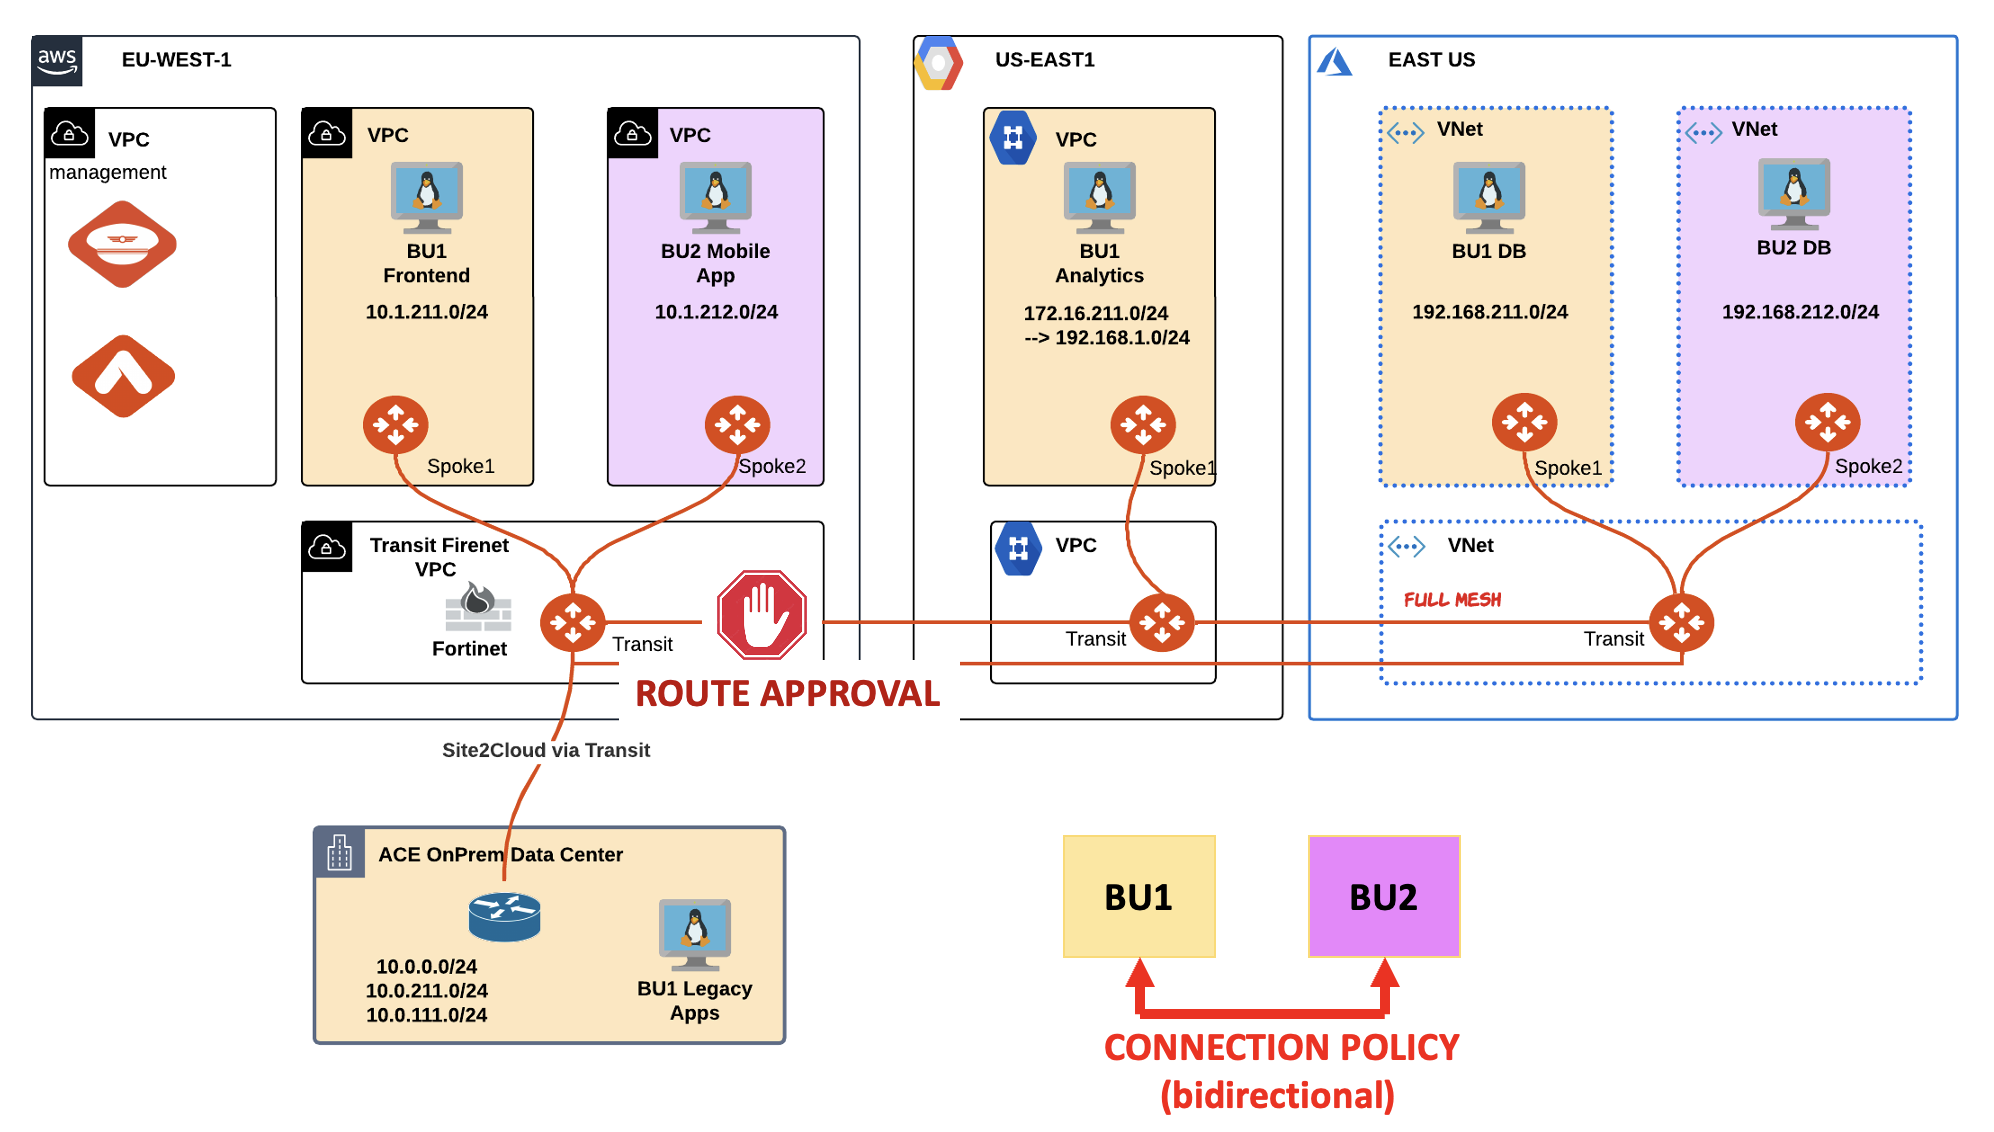
Fig. 107 Lab 6 Scenario#1: Topology#
2. CHANGE REQUEST#
Activate the Route Approval feature for monitoring unauthorized advertisements that could be received by the DC.
Tip
Go to CoPilot > Cloud Fabric > Gateways > Transit Gateways > select the ace-aws-eu-west-1-transit1 GW > Settings > Border Gateway Protocl (BGP) > and turn on the Gateway Learned CIDR Approval knob.
Then click on Save.
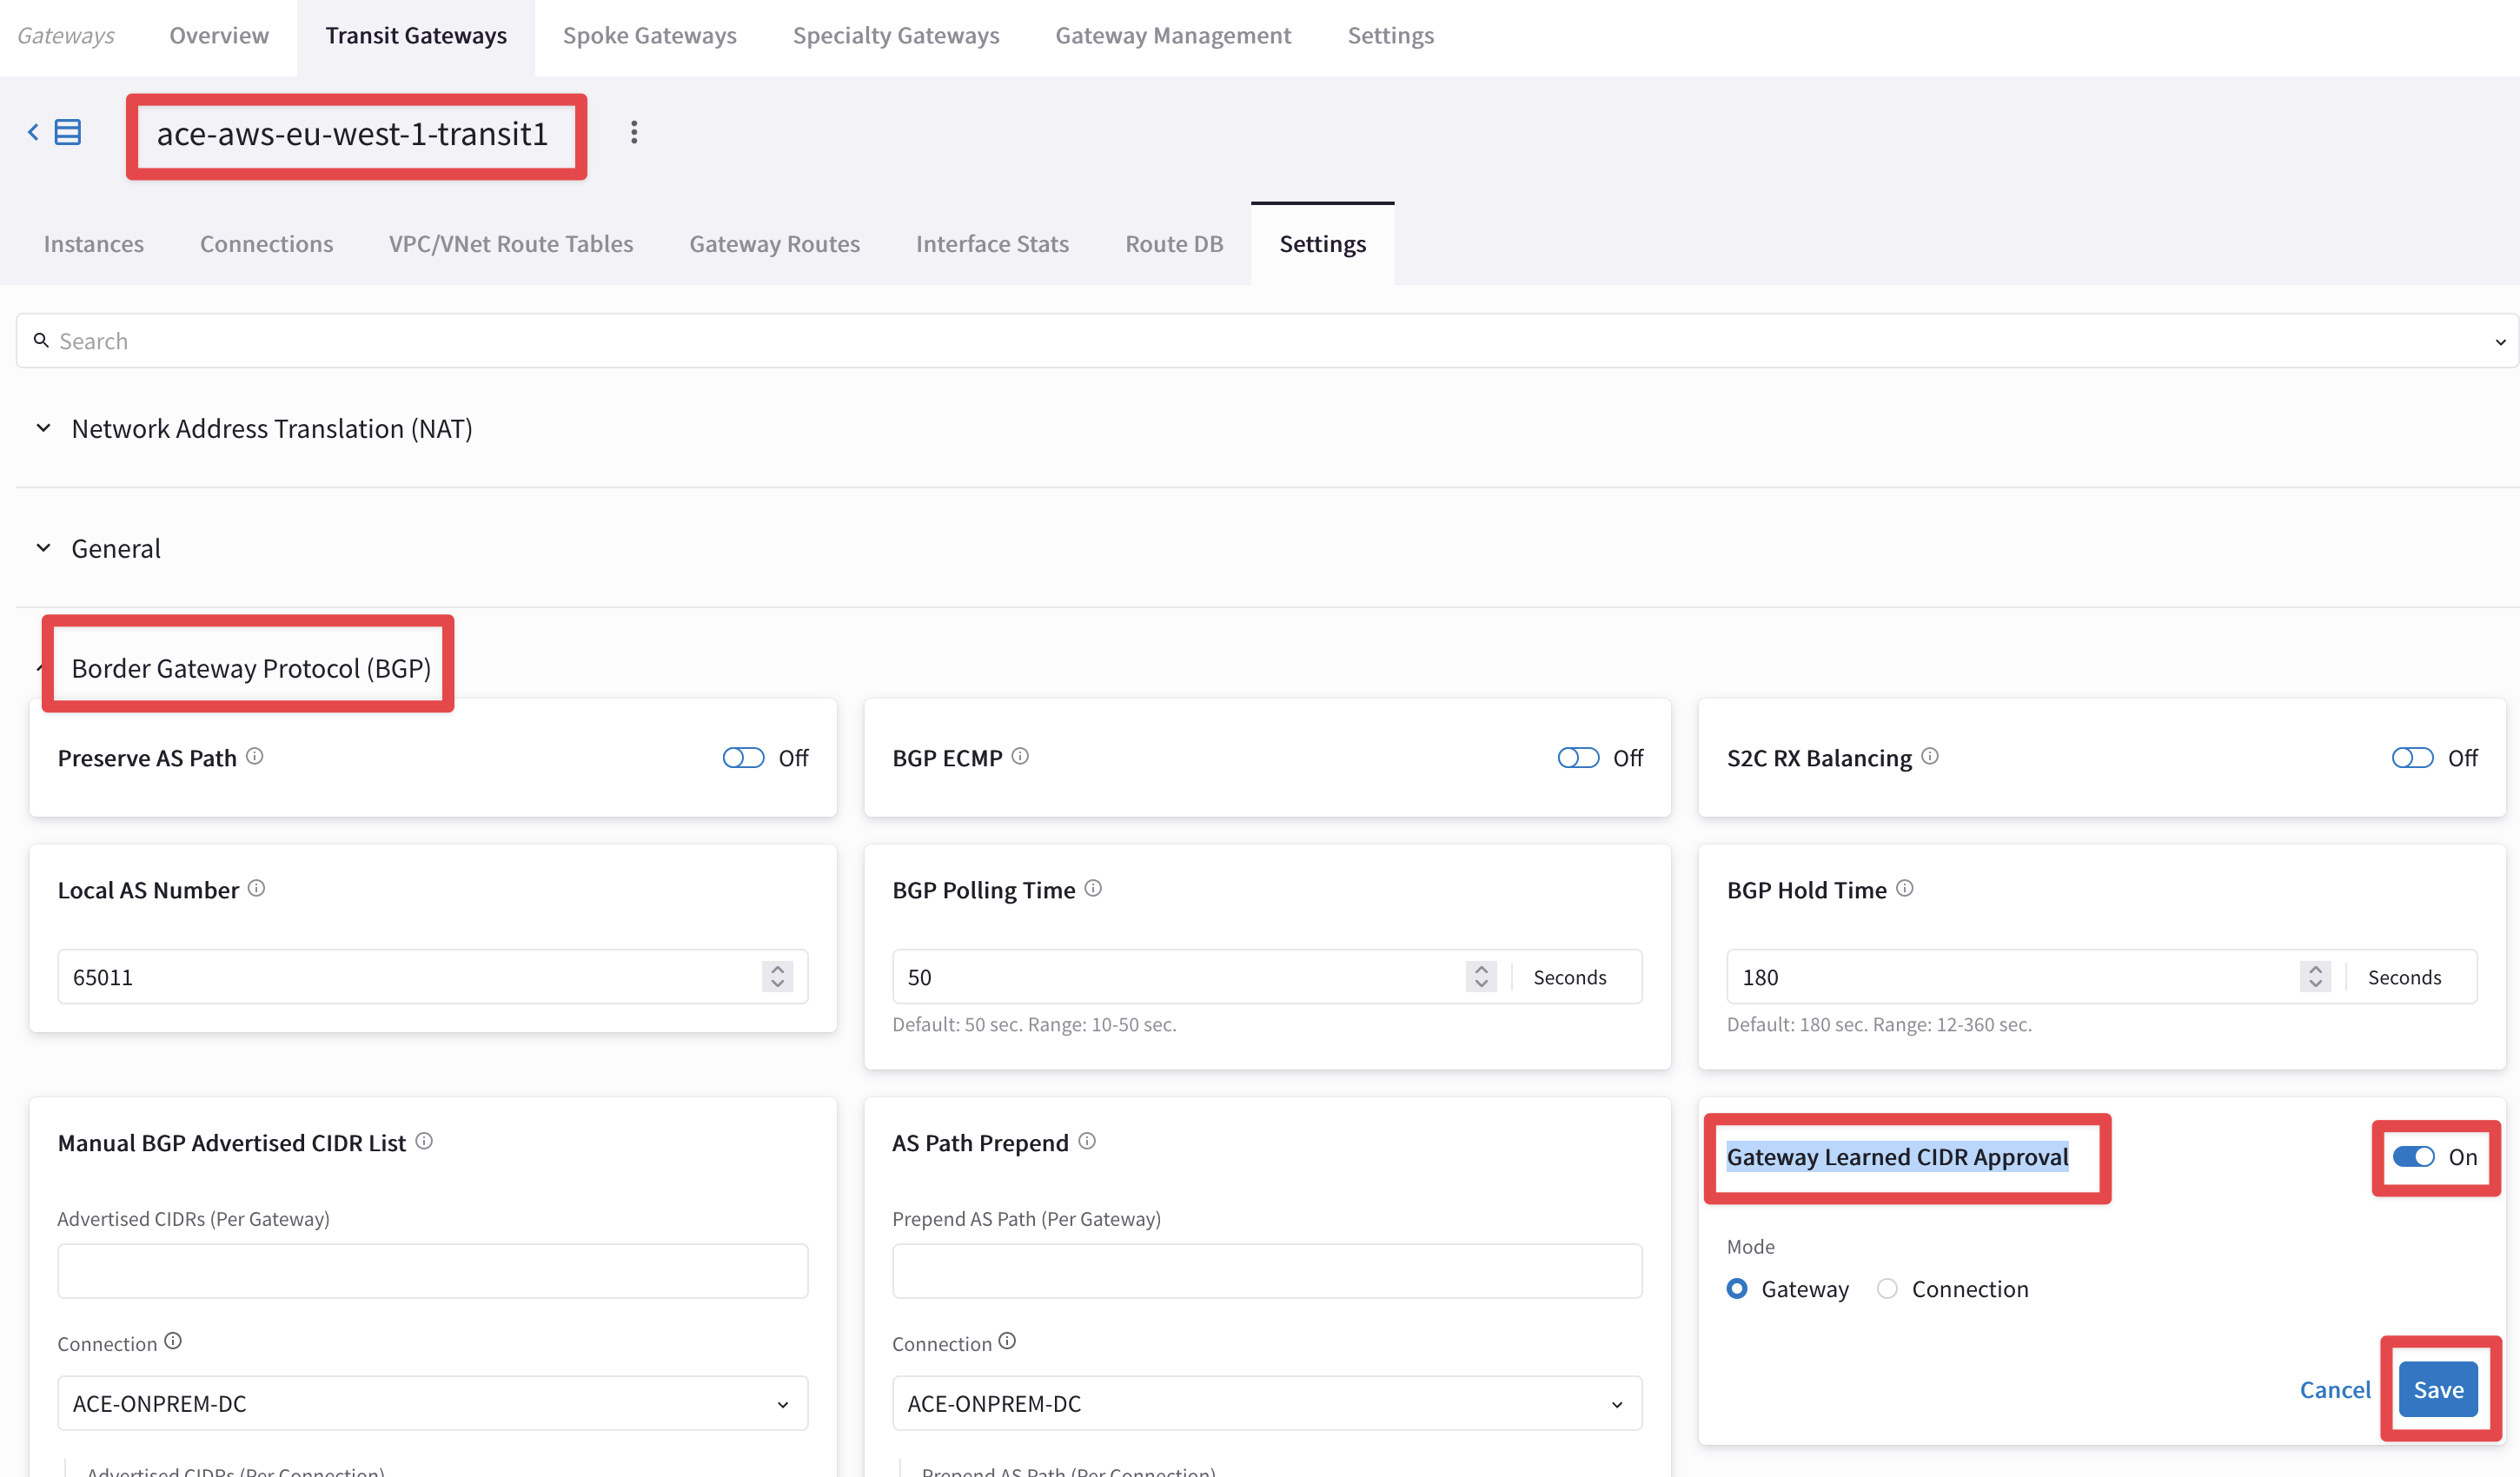
Fig. 108 Route Approval#
Afterwards, inform the trainer that you have activated the feature with the tool “Raise Hand” on Zoom, as depicted below, and type the number of your POD in the Zoom chat!
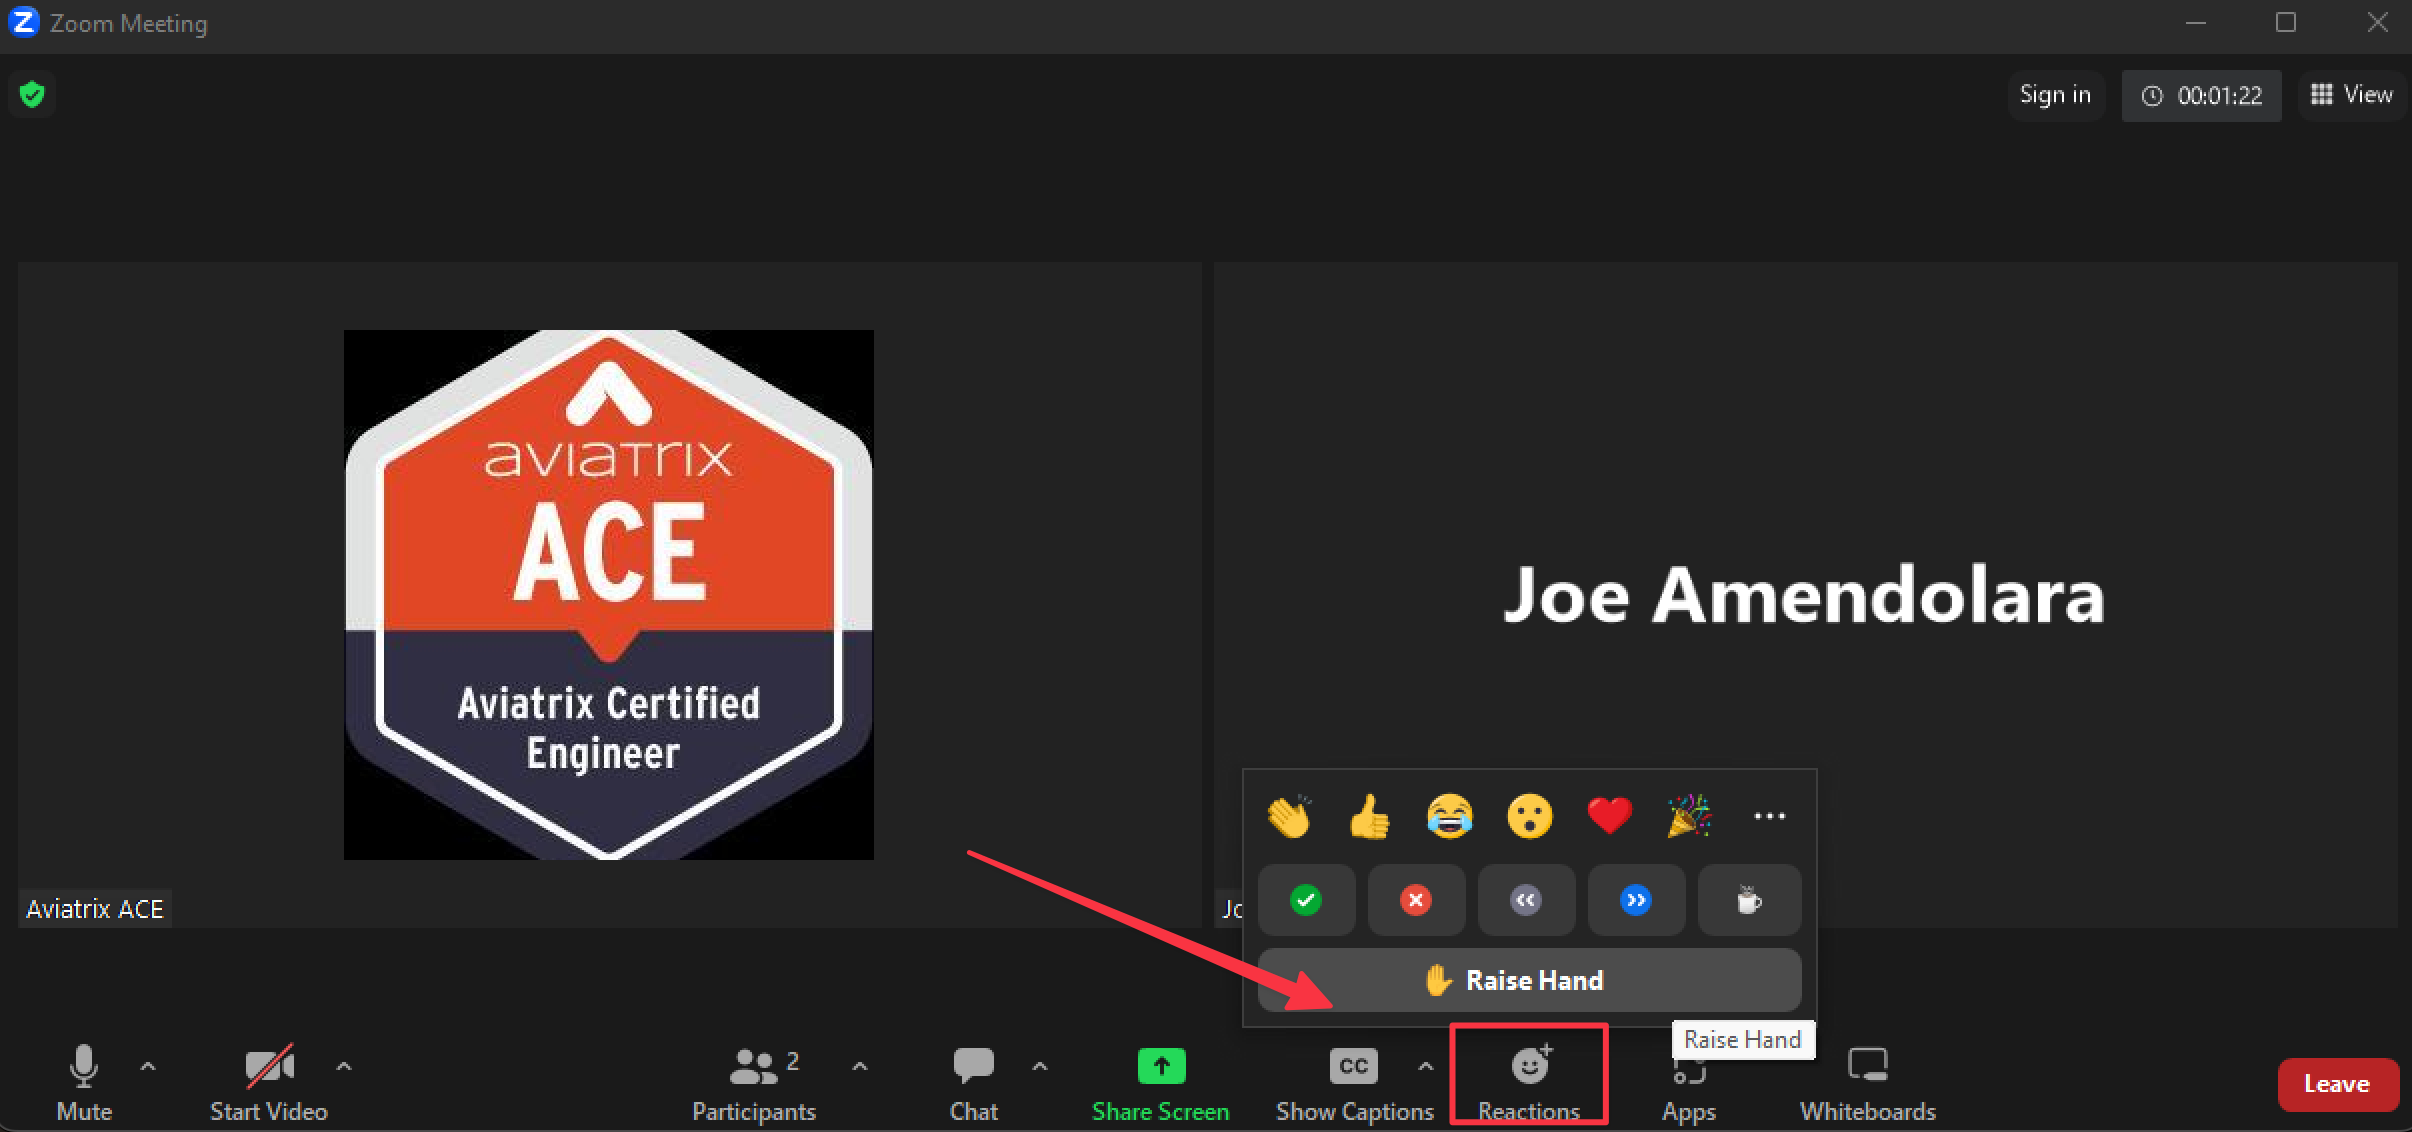
Fig. 109 Raise Hand tool on Zoom#
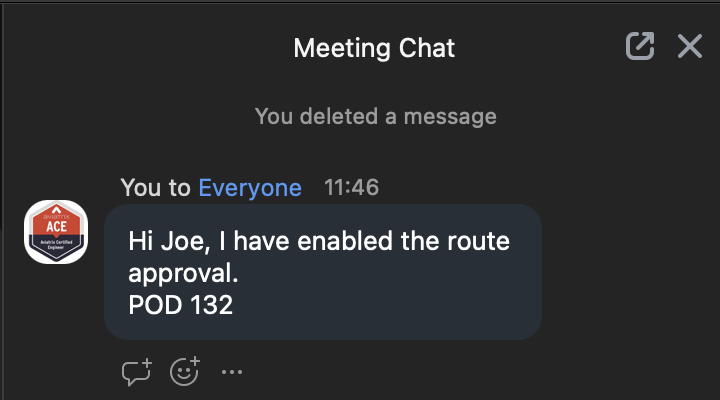
Fig. 110 Communicate your POD number#
Go to CoPilot > Cloud Fabric > Gateways > Transit Gateways > select the ace-aws-eu-west-1-transit1 GW > Approval
Note
Wait for approximately one minute for BGP in order to send the Update. Then click on the refresh button to see a default route being advertised from the DC.
This route will remain in pending state and it will be not advertised within the MCNA untill it gets the final approval from the Aviatrix Administrator.
Do not approve it! If you accidentally approve it, you can click on Remove and store it back on the Pending status.
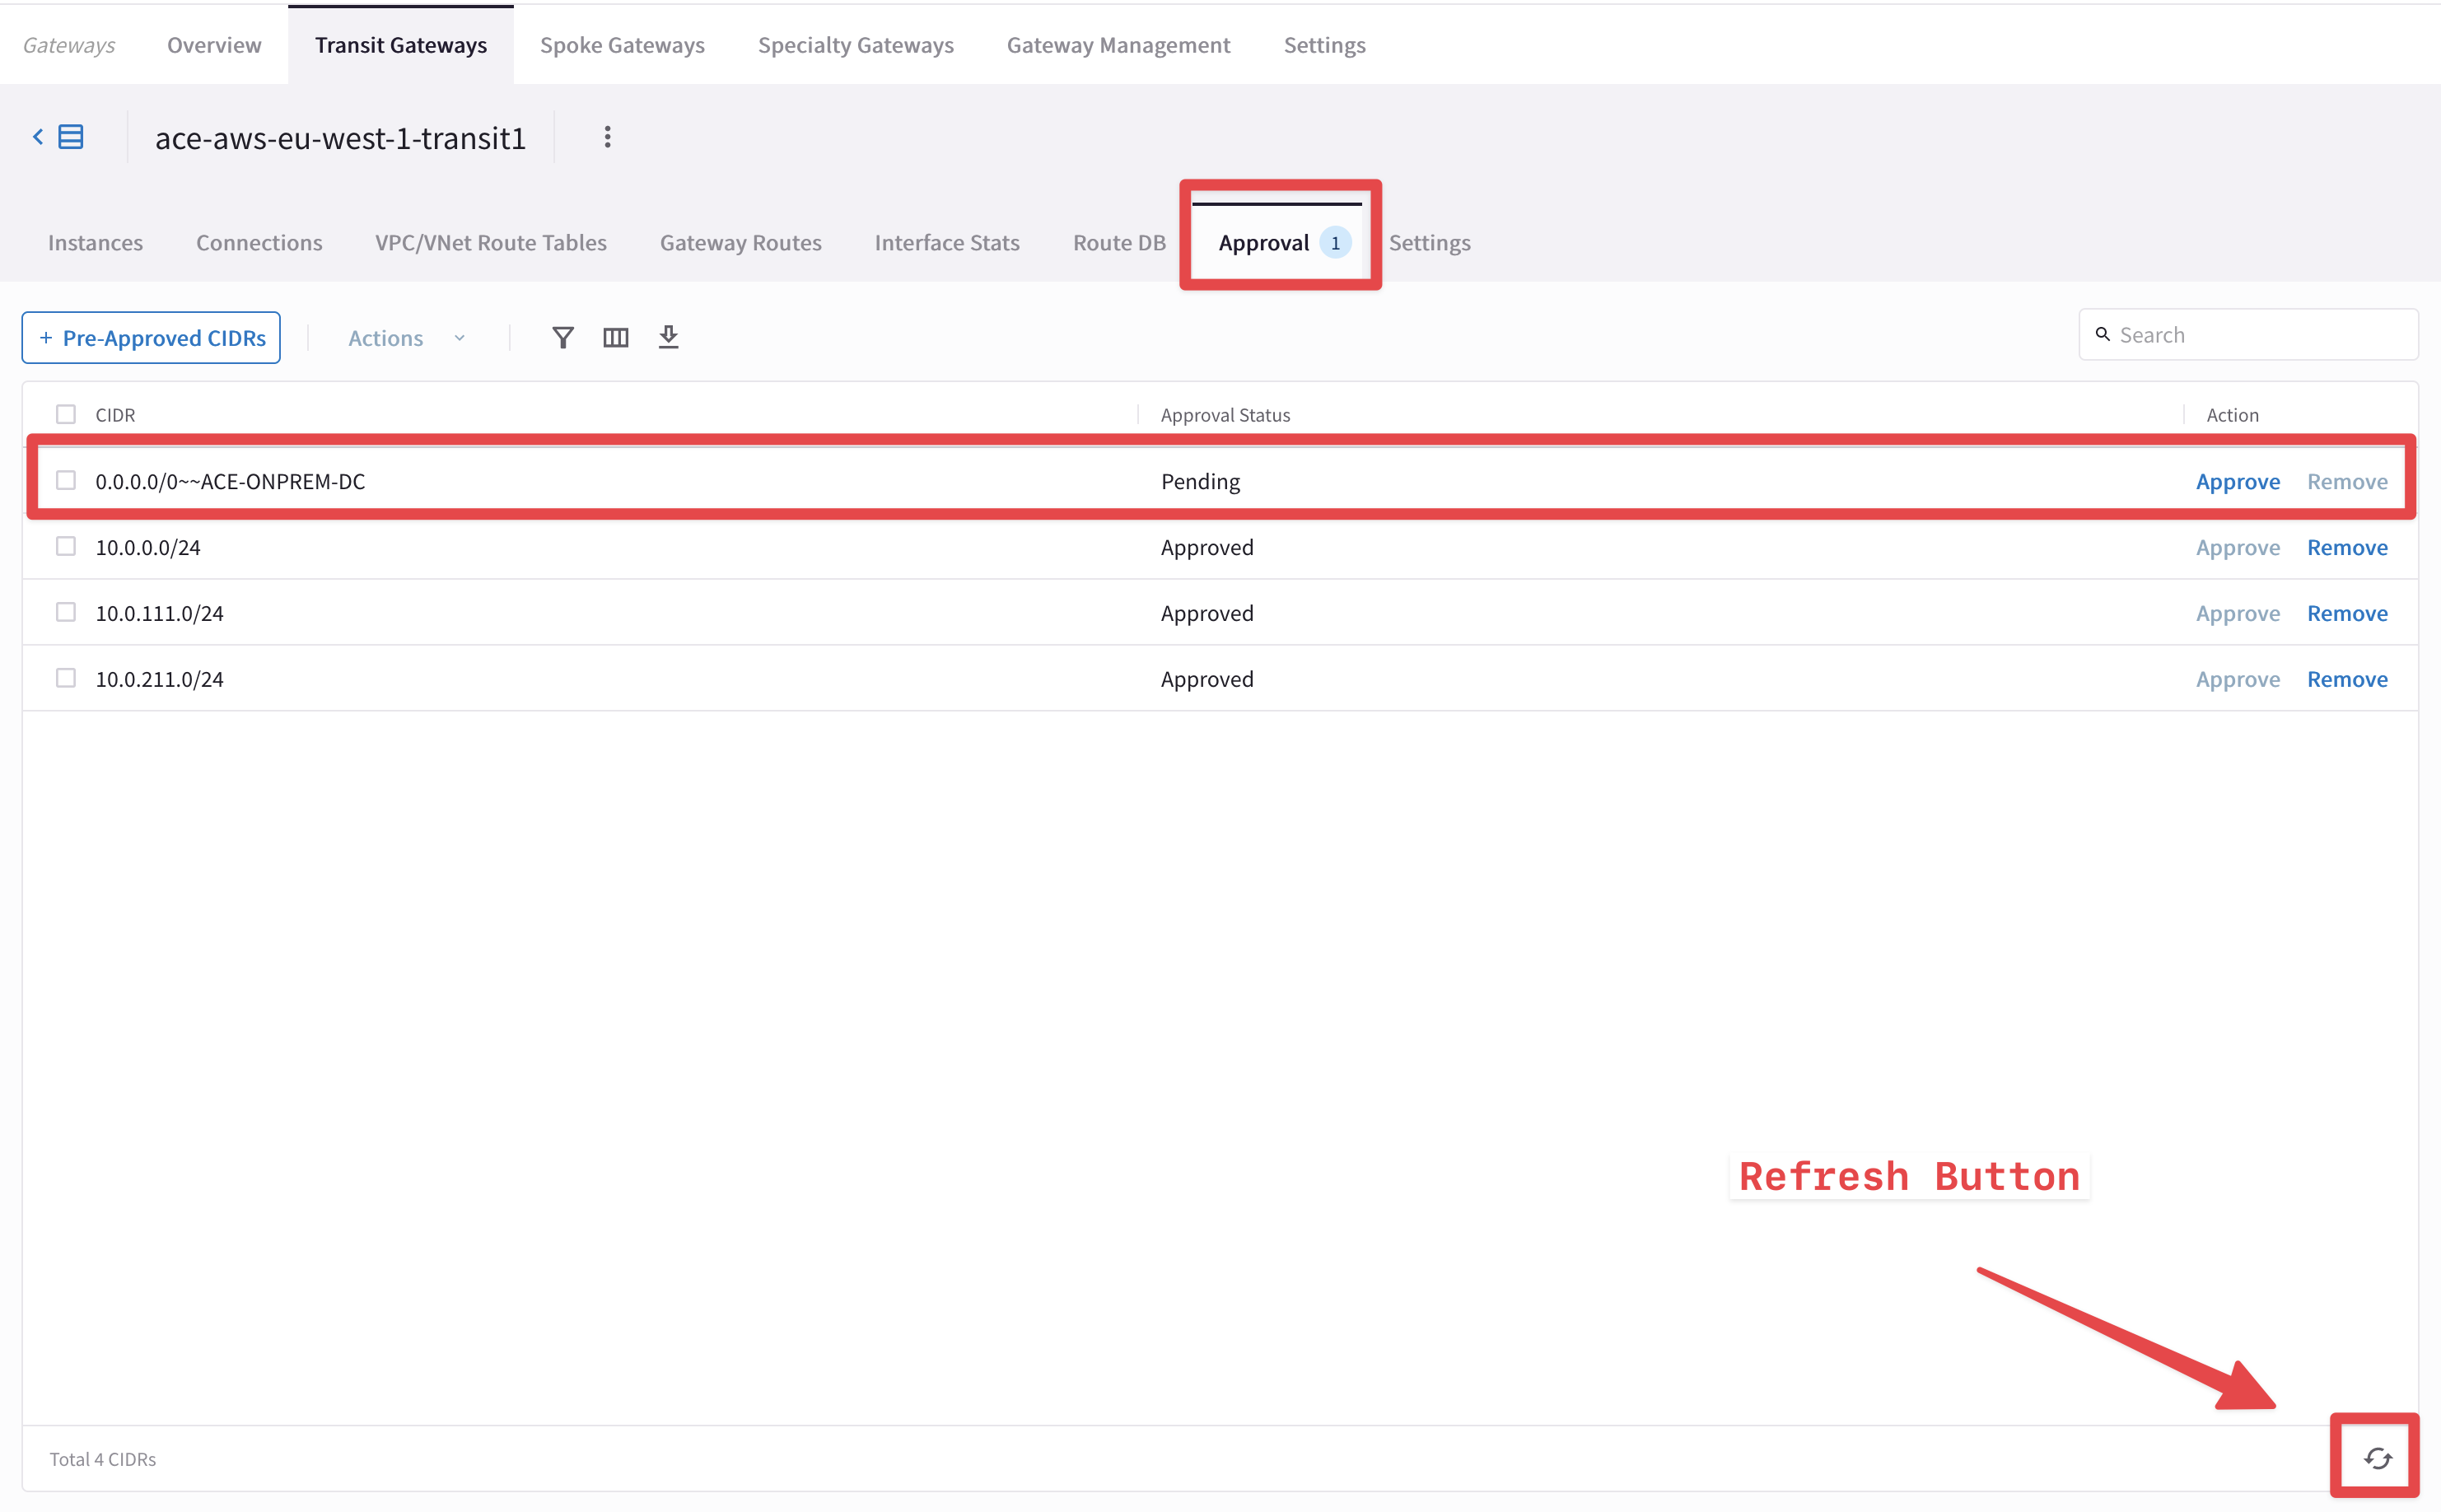
Fig. 111 Refresh#
Important
You have successfully prevented that somebody from the DC could jeopardize the whole network inside the multicloud infrastructure!
Once again do not approve that default route!
3. SCENARIO#2#
ACE’s OnPrem Partner needs to be connected to the MCNA in the GCP region, however, it has overlapping IP’s with BU1’s Analytics VPC.
You have been engaged for creating a Site2Cloud connection between the GCP Spoke GW and the OnPrem Partner router and also for resolving the IP conflict through the Mapped NAT feature.
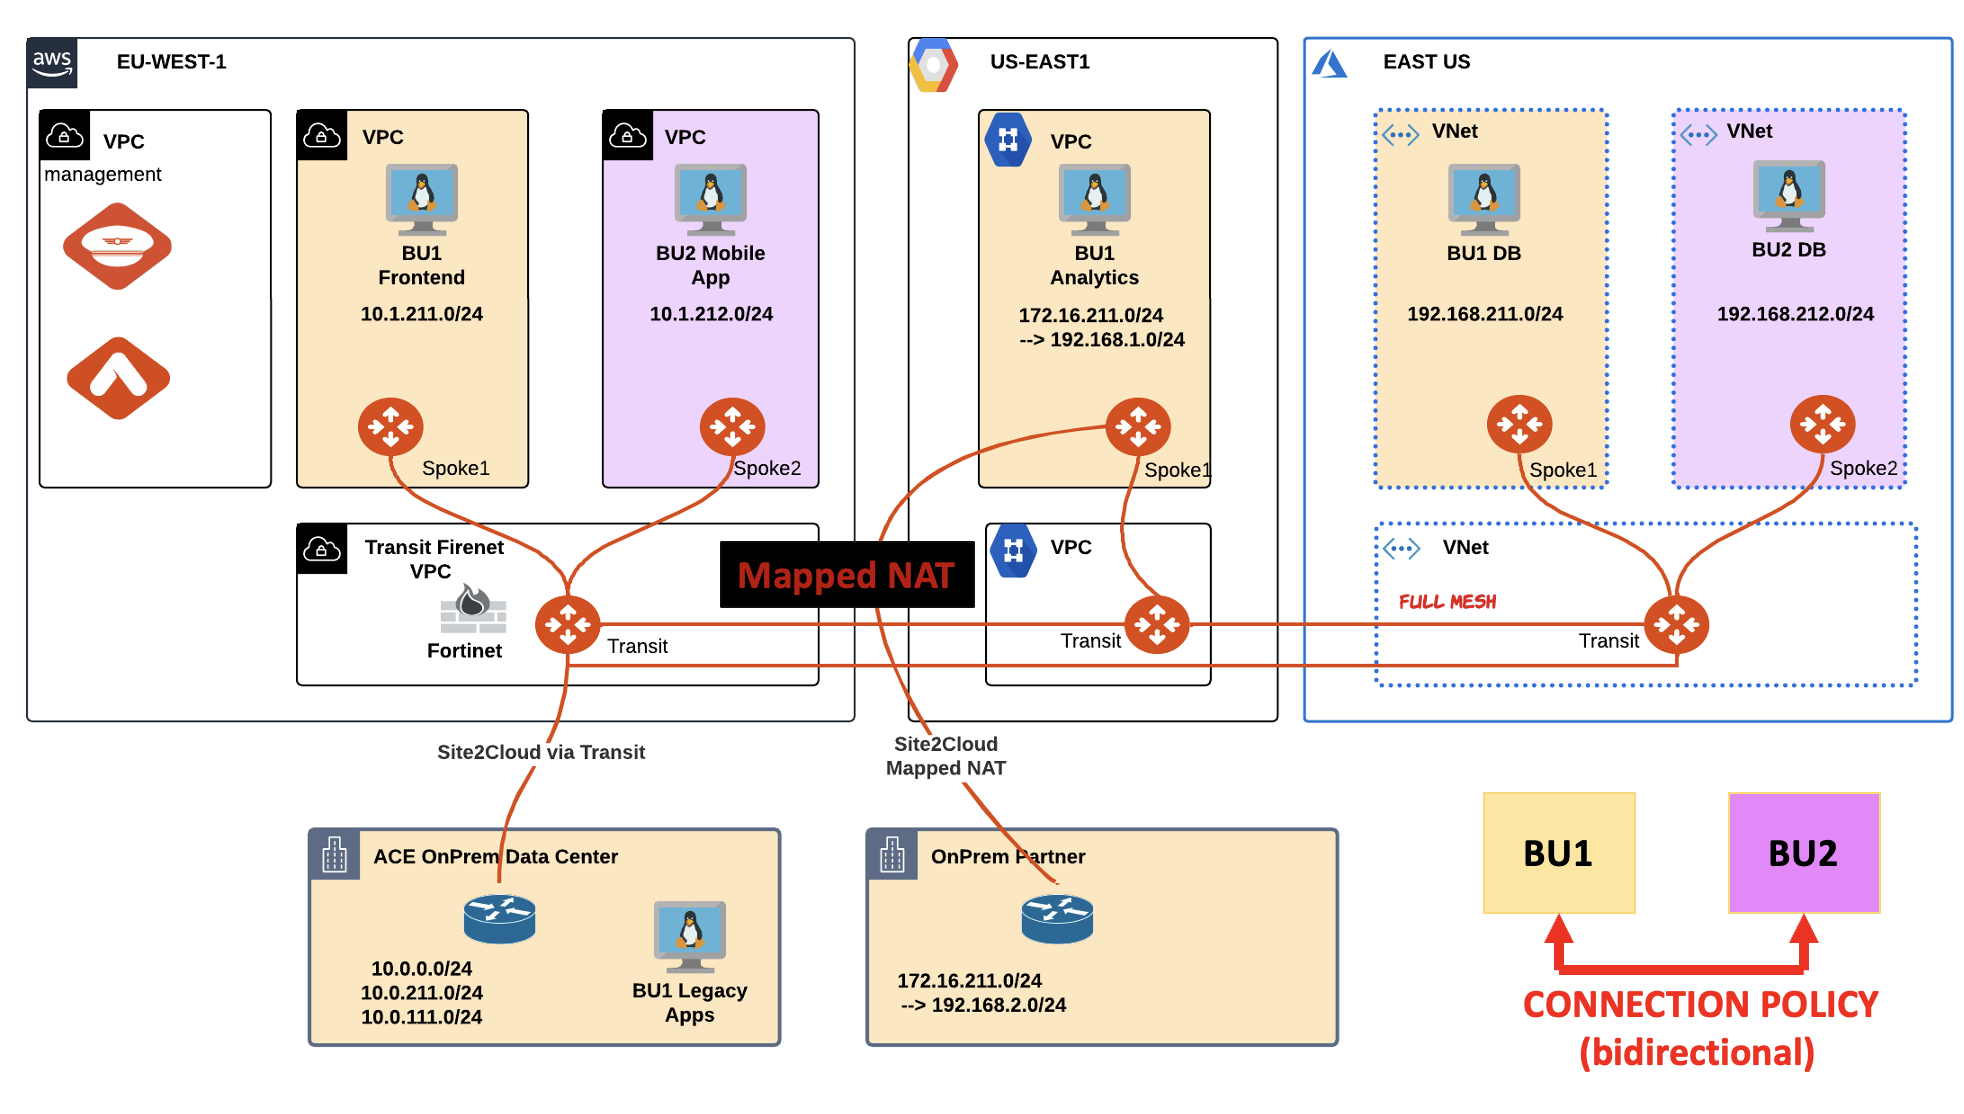
Fig. 112 Lab 6 Scenario#2: Topology#
4. CHANGE REQUEST#
Create a new S2C connection.
Tip
Go to CoPilot > Networking > Connectivity > External Connection (S2C) > then click on the "+External Connection" button.

Fig. 113 New S2C#
Configure the new S2C connection based on the schema below.
Name: S2C-PARTNER
Connect Public Cloud to:
External Device
Static Route-Based (Mapped)
Local Gateway: ace-gcp-us-east1-spoke1
Real Local Subnet CIDR(s): 172.16.211.0/24
Virtual Local Subnet CIDR(s): 192.168.1.0/24
Remote Gateway Type: Generic
Real Remote Subnet CIDR(s): 172.16.211.0/24
Virtual Remote Subnet CIDR(s): 192.168.2.0/24
Advanced Settings:
IkEv2: On
Connection:
Remote Gateway IP: follow the Note below
Note
Use the “dig partner-csr-public.pod#.aviatrixlab.com +short” command from your personal laptop terminal to resolve the symbolic public name of the OnPrem-Partner CSR router and retrieve the REMOTE GATEWAY PUBLIC IP address, as depicted in the example below.
Replace the # symbol with your POD number!
The example is referring to POD #35 (please issue the command based on your POD number!).

Fig. 114 Retrieving the Public IP#
Tip
For Windows OS you can use the command "nslookup":
nslookup partner-csr-public.pod#.aviatrixlab.com
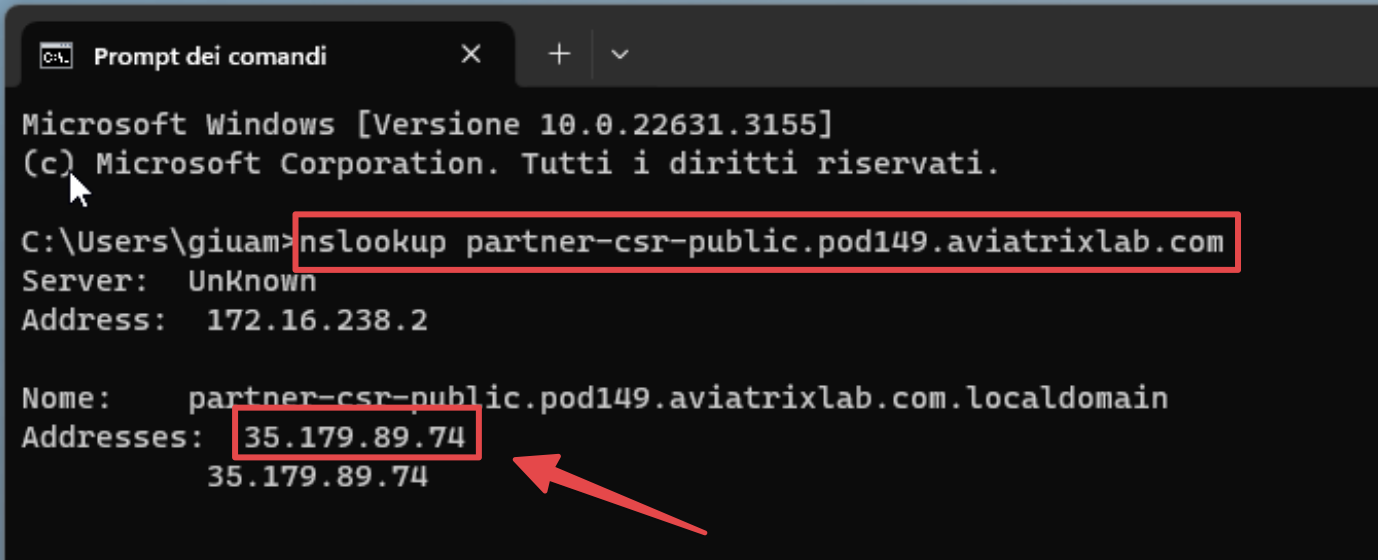
Fig. 115 Nslookup#
Local Gateway Instance: ace-gcp-us-east1-spoke1
Local Tunnel IP: 169.254.0.1/30
Remote Tunnel IP: 169.254.0.2/30
Pre-Shared Key: Aviatrix123#
Important
Do not forget to click on Save.
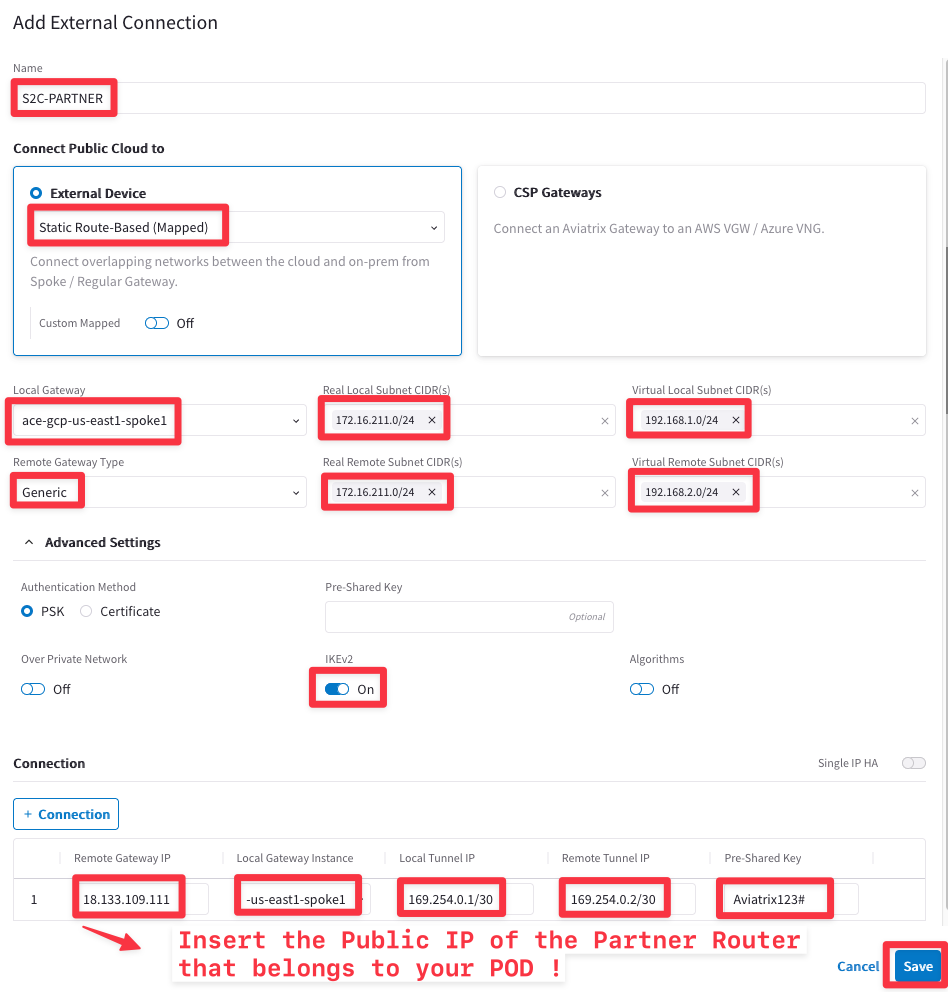
Fig. 116 External Connection Configuration#
Wait some seconds for the completion of the S2C. The new connection will show up with a red ball symbol.

Fig. 117 S2C is establishing the connection#
Click on the refresh button to see the status changing from red to green.

Fig. 118 S2C is finally UP#
SSH to the OnPrem partner router and issue the following command, to confirm that the Tunnel is up/up:
show ip int brief

Fig. 119 Tunnel1 up/up#
Then from the OnPrem Partner router issue the following command:
ping 192.168.1.100 source gigabitethernet1

Fig. 120 Ping is ok#
Launch the
Active Sessions.
Tip
Go to CoPilot > Diagnostics > Diagnostics Tools > Gateway Diagnostics, select the ace-gcp-us-east1-spoke1 GW and then select the Active Sessions tool.
Click on Run and almost simultaneously issue once again the ping command from the CSR router.
Filter based on the "ICMP" keyword.
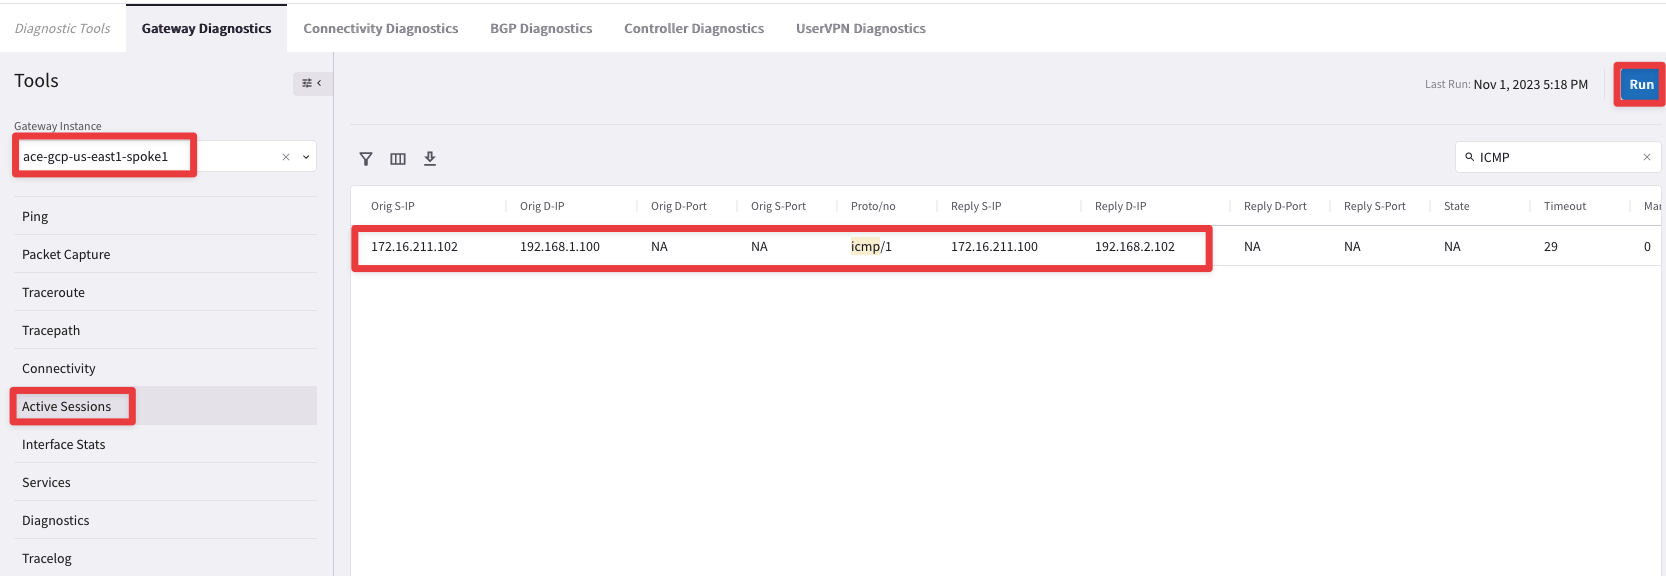
Fig. 121 Mapped NAT in action !#
