Lab 2 - Connection Policy#
1. SCENARIO#
Now ACE Inc. has decided that BU1 and BU2 need to be able to communicate with each other. You are engaged for applying a Connection Policy in order to merge the two Network Domains.
After the change has been applied, verify that both the network domains have been merged together, successfully.
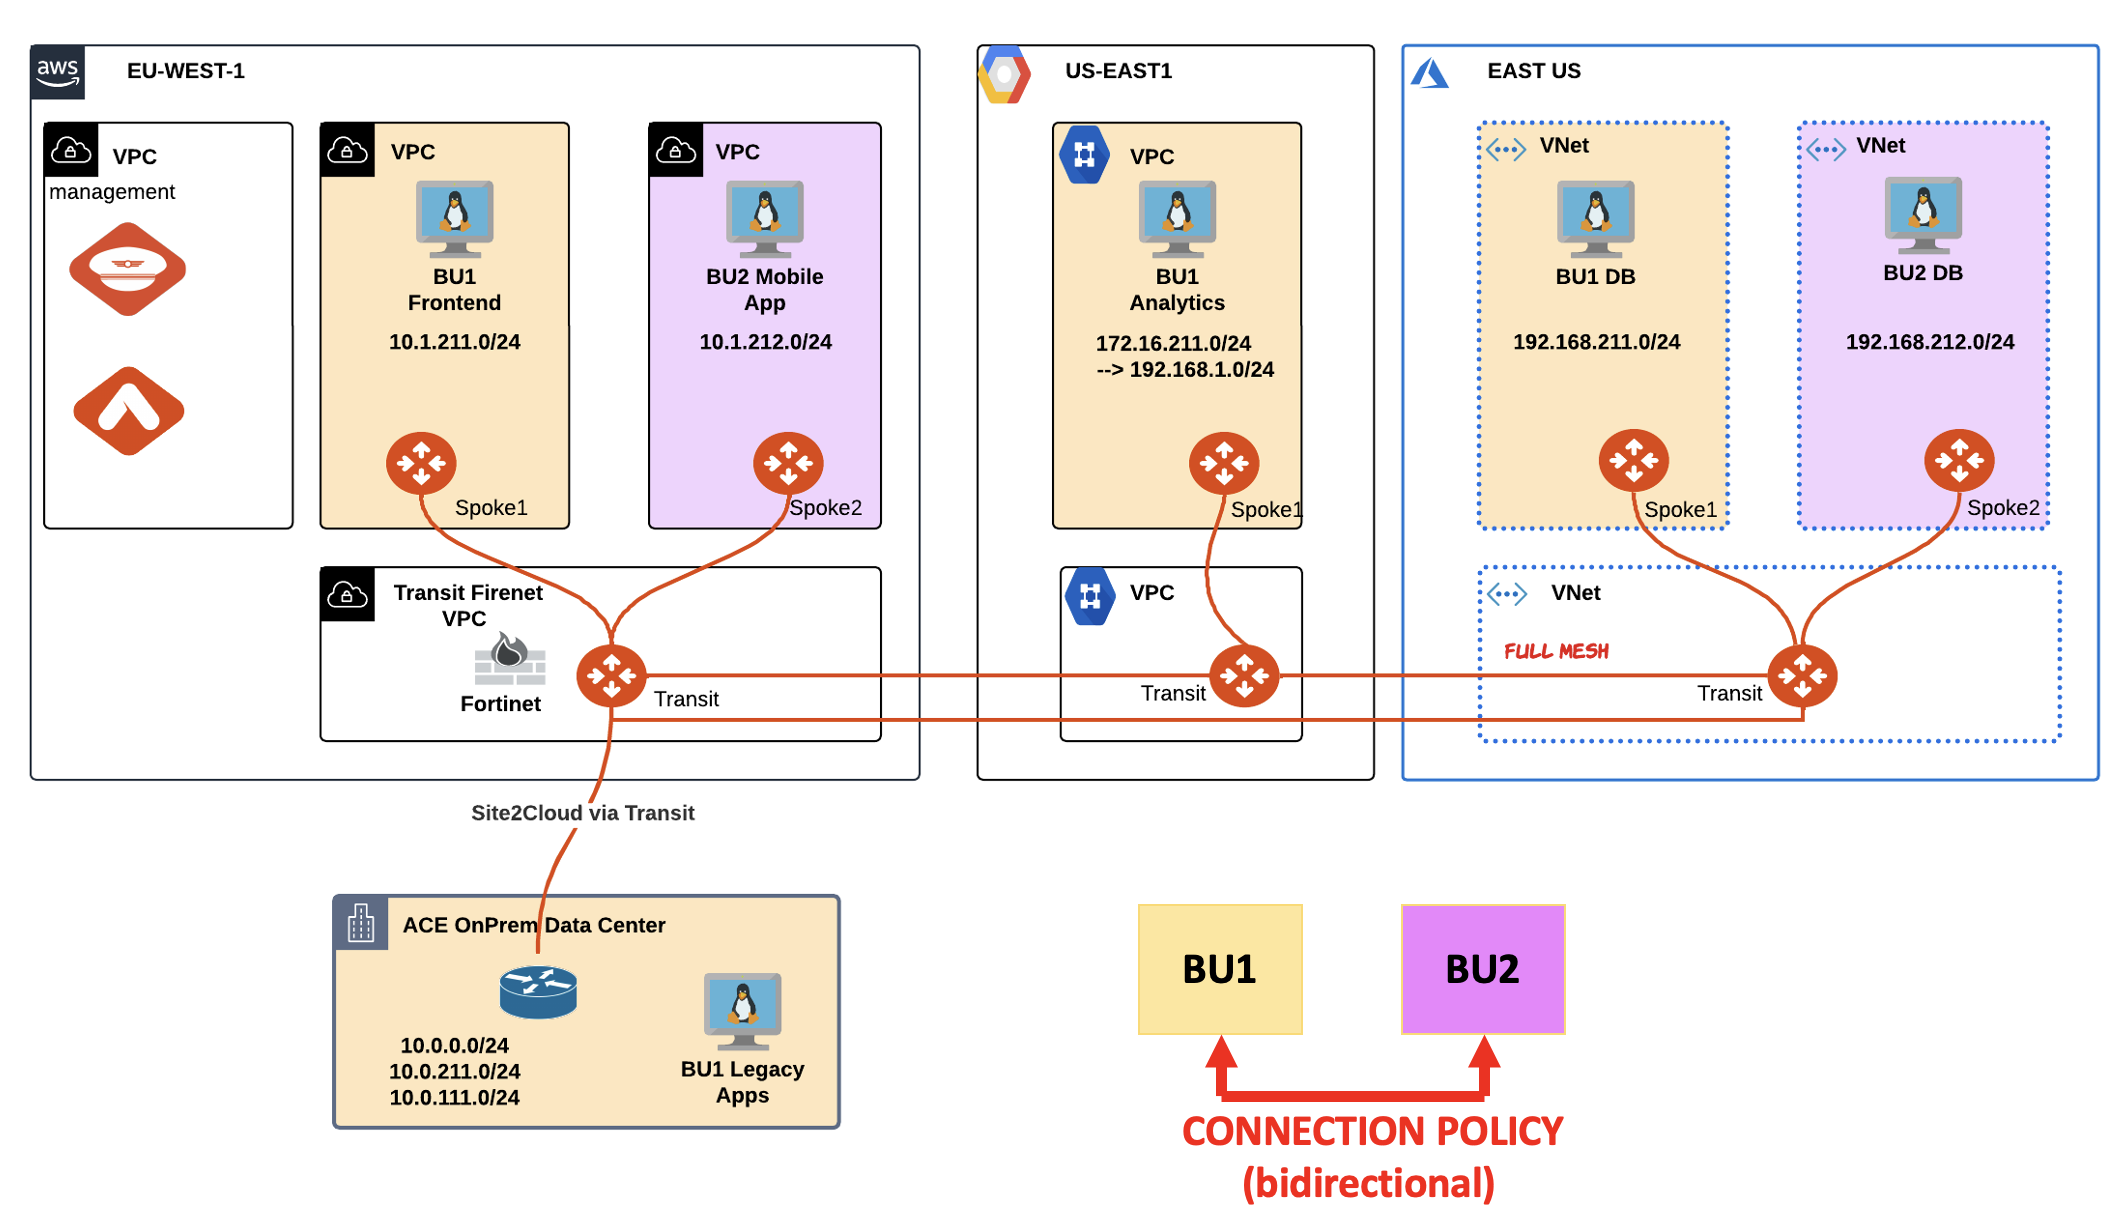
Fig. 30 Network Domains with the Connection Policy#
2. CHANGE REQUEST#
Apply the Connection Policy
Tip
Go to CoPilot > Networking > Network Segmentation > Network Domains and then edit either network domains.
The Connection Policy works bidirectionally!

Fig. 31 Edit the Network Domain#
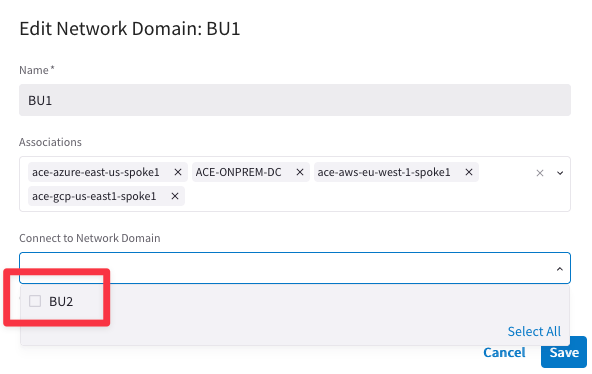
Fig. 32 BU1 editing#
Check the Logical View inside the Network Segmentation section.
Tip
Go to CoPilot > Networking > Network Segmentation > Overview > Logical View.
This time you can notice the network relationships successfully established between the two Network Domains.
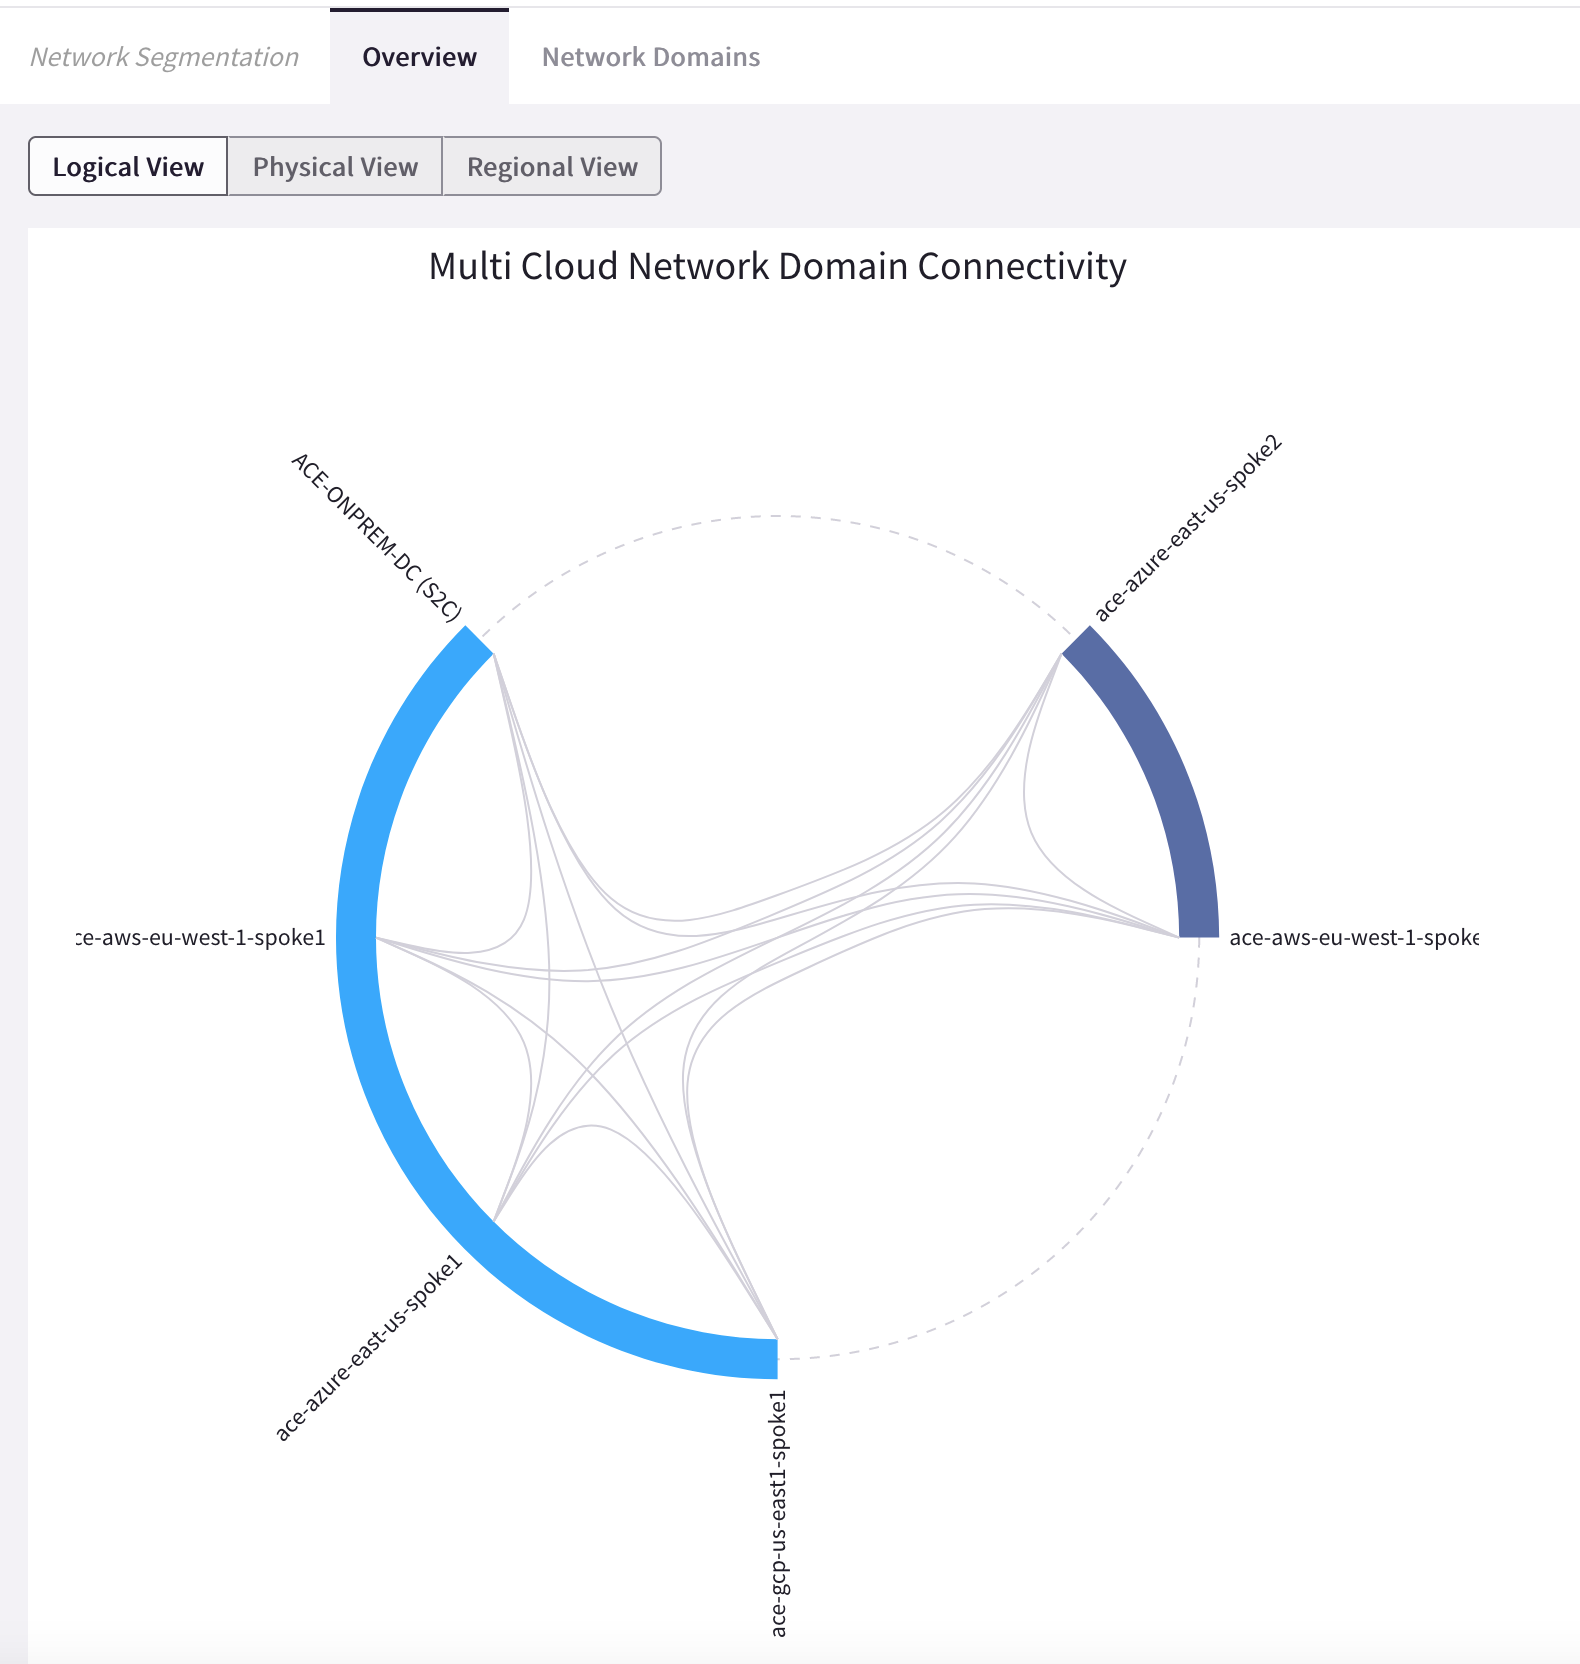
Fig. 33 Logical View#
Verify the connectivity between BU1 and BU2 domains.
SSH to BU1 Frontend and carry out ping/ssh commands towards BU2 Mobile App.
Ping and SSH between the two BUs should finally work, thanks to the
Connection Policy(aka VRF leaking).
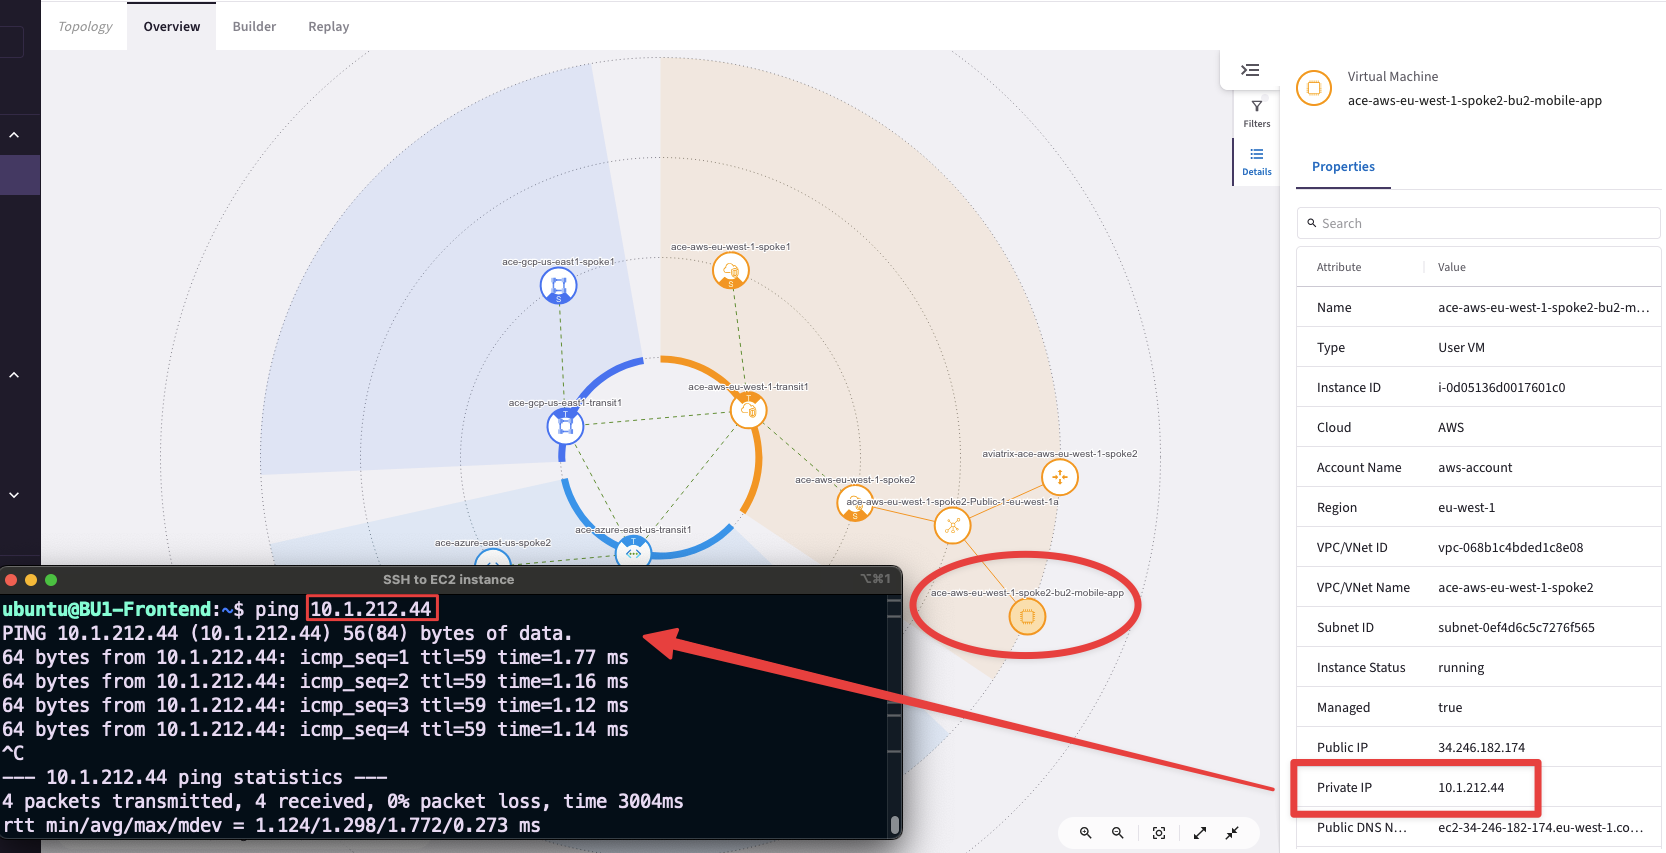
Fig. 34 BU1 to BU2 is ok#
Check the different routing tables (VRFs) maintained by any of the Transit Gateways.
Tip
Go to CoPilot > Cloud Fabric > Gateways > Transit Gateways > select the gateway ace-aws-eu-west-1-transit1 > Gateway Routes and filter out based on any Network Domains.
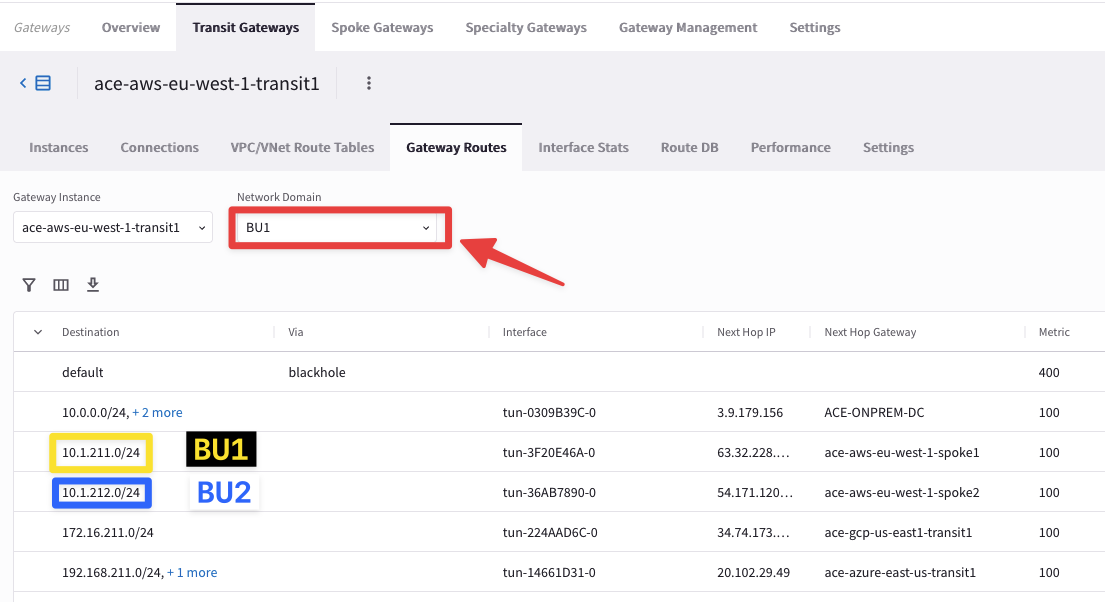
Fig. 35 View on a specific RTB#
Important
The Spoke Gateways provide visibility only of the main routing table, the Global Routing Table (aka GRT), whereas the Transit Gateways provide visibility of all routings tables (the main rtb + any additional RTBs created through the Segmentation feature).
3. TROUBLESHOOT REQUEST#
From the BU1 Frontend, execute the
curlcommand towards the private IP of BU2 Mobile App.
Important
Refer always to your personal POD for the IP addresses.

Fig. 36 curl fails…#
You will notice that after issuing the curl command, it will hang and then, after some seconds, a message will be displayed reporting that the attempt to connecting to port 80 has indeed failed.
Important
Curl is not working, despite having both Ping and SSH working correctly.
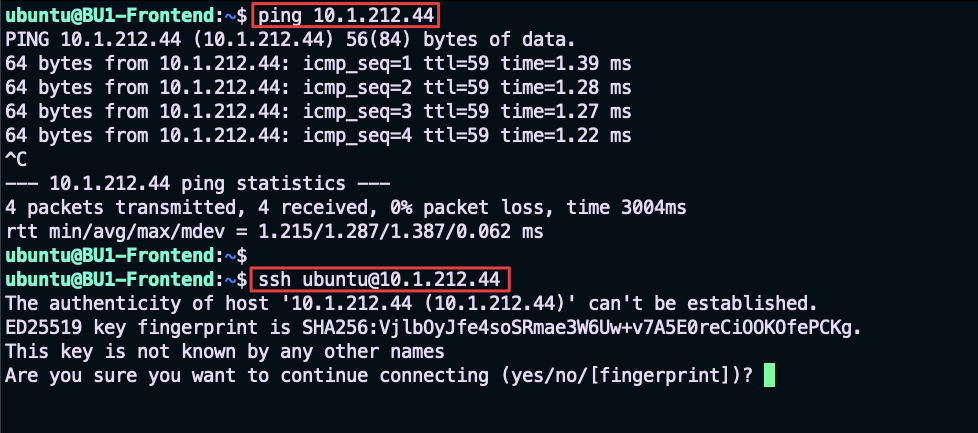
Fig. 37 PING and SSH are successful#
Use
AppIQfor checking the native cloud constructs that separate the two nodes involved on this test.
Tip
Go to CoPilot > Diagnostics > AppIQ > FlightPath
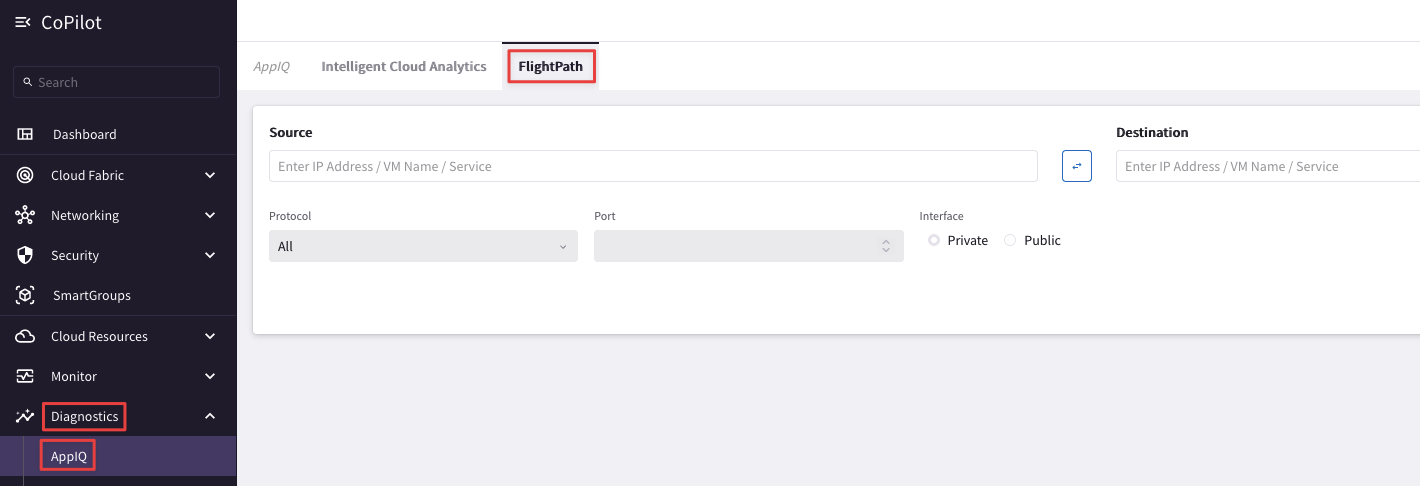
Fig. 38 FlightPath#
Select the following parameters and then click on Run AppIQ.
Source: ace-aws-eu-west-1-spoke1-bu1-frontend
Destination: ace-aws-eu-west-1-spoke2-bu2-mobile-app
Protocol: TCP
Port: 80
Interface: Private (default)

Fig. 39 AppIQ configuration#
Wait for some seconds and then check the report!
The Security Group attached to BU2 Mobile APP is missing a rule that should allow inbound traffic on tcp/80.

Fig. 40 AppIQ report#
Note
AppIQ is a troubleshooting tool. It retrieves and displays, in a side by side fashion, cloud provider’s network related information such as Security Groups, NACLs and Route Tables.
This helps you to identify connectivity problems on the underlay environments of each CSP involved along the communication path between two nodes.
3.1. Verify from AWS Console#
Log in to the AWS console.
Important
Go to your personal POD portal and click on the Console button under the AWS Console section.
Sign in using the provided credentials (these screenshots refer to Pod 143).

Fig. 41 POD Portal - AWS Console button#
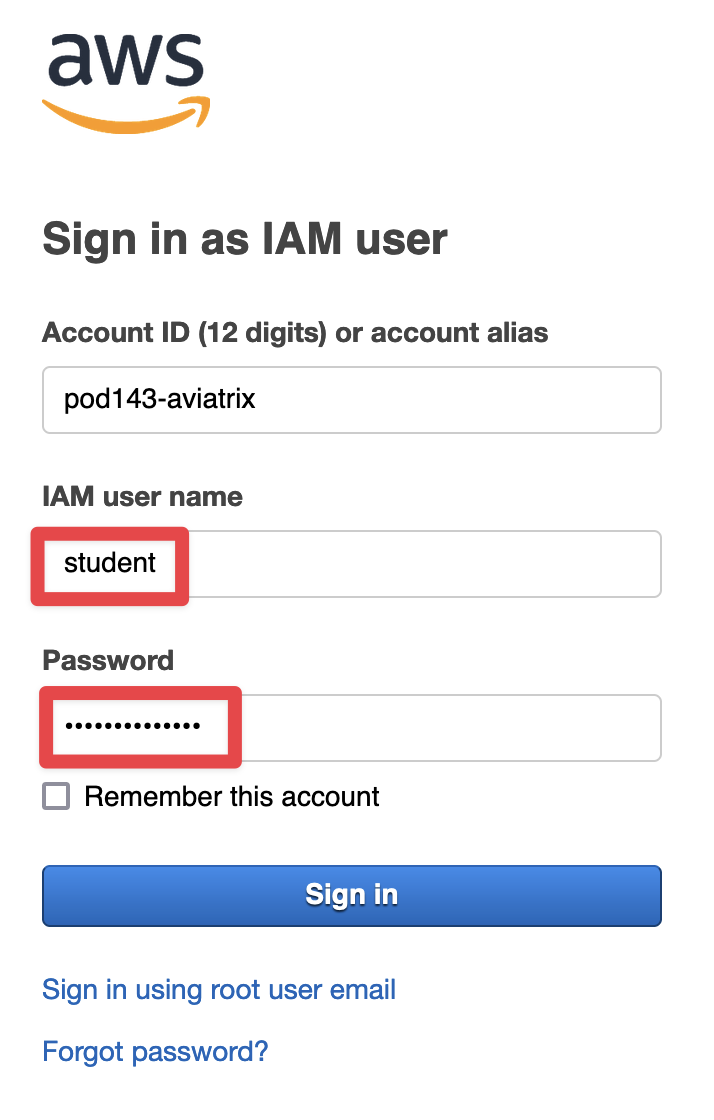
Fig. 42 AWS#
Change the region to Ireland (eu-west-1) in the top-right corner and invoke the EC2 service, then click on the Instances (running) section.
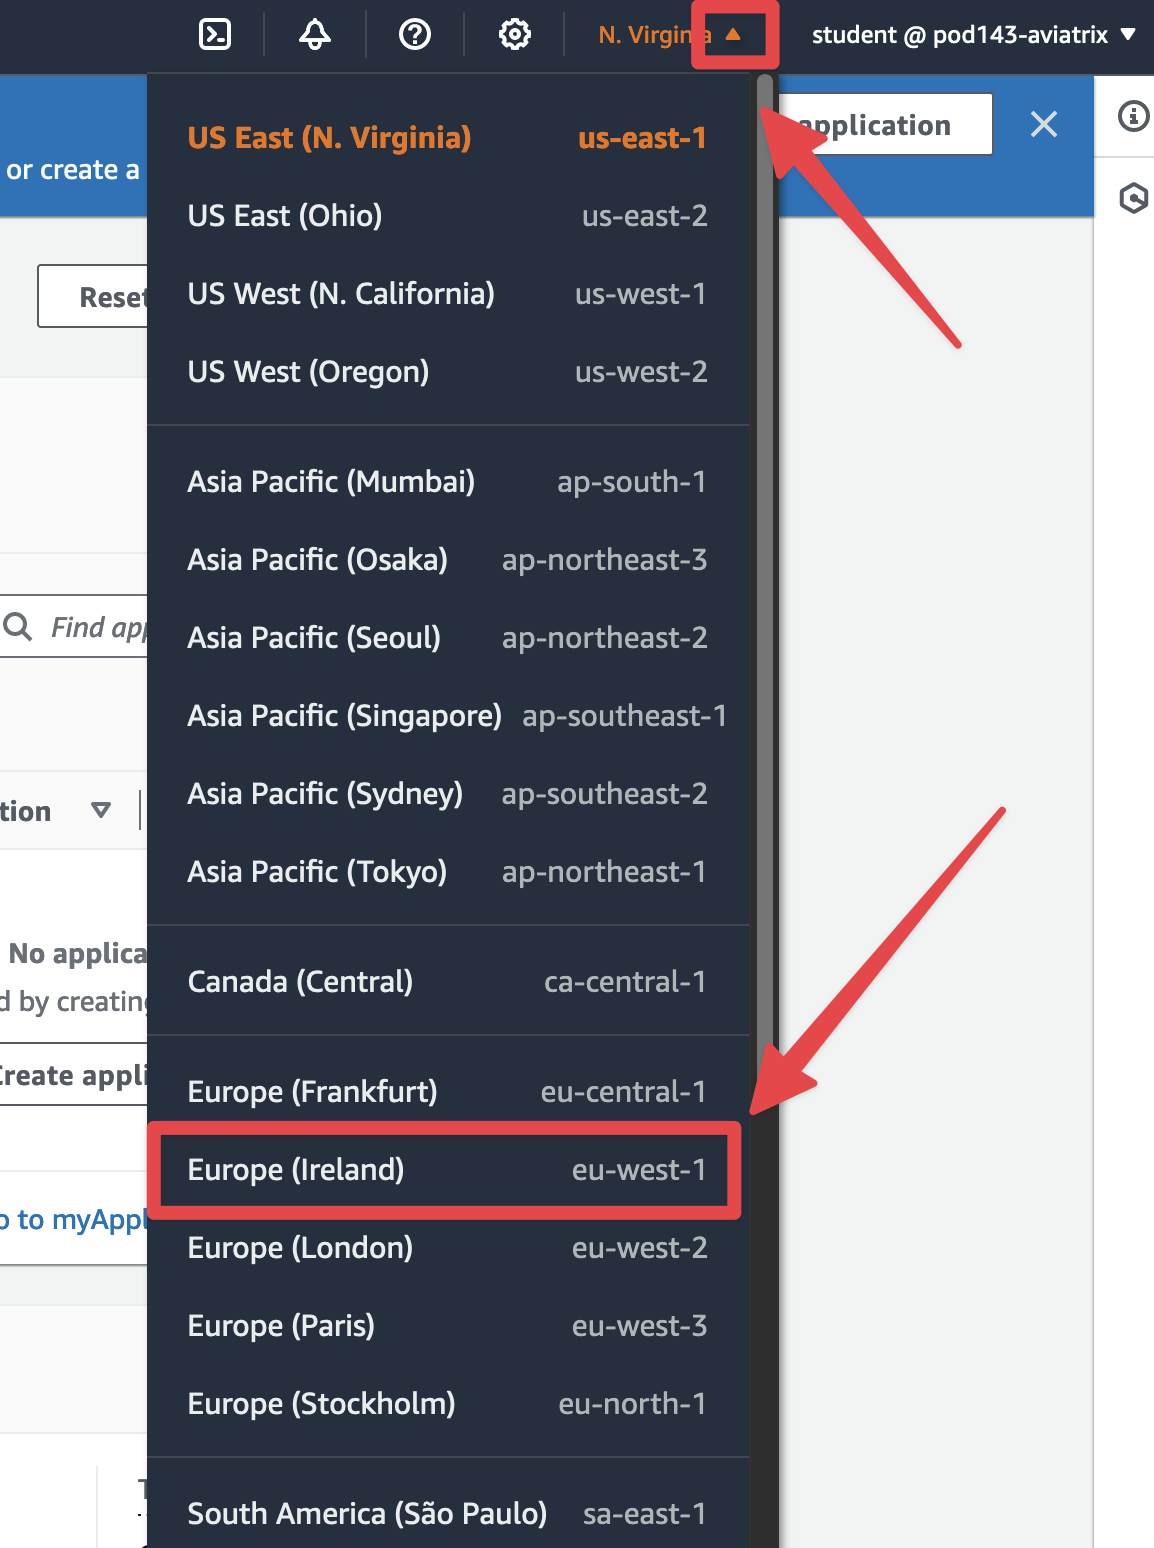
Fig. 43 AWS#

Fig. 44 Instances (running)#
Search for ace-aws-eu-west-1-spoke2-bu2-mobile-app, select the instance and choose the tab "Security" below and then click on the security group identificator with a long string.
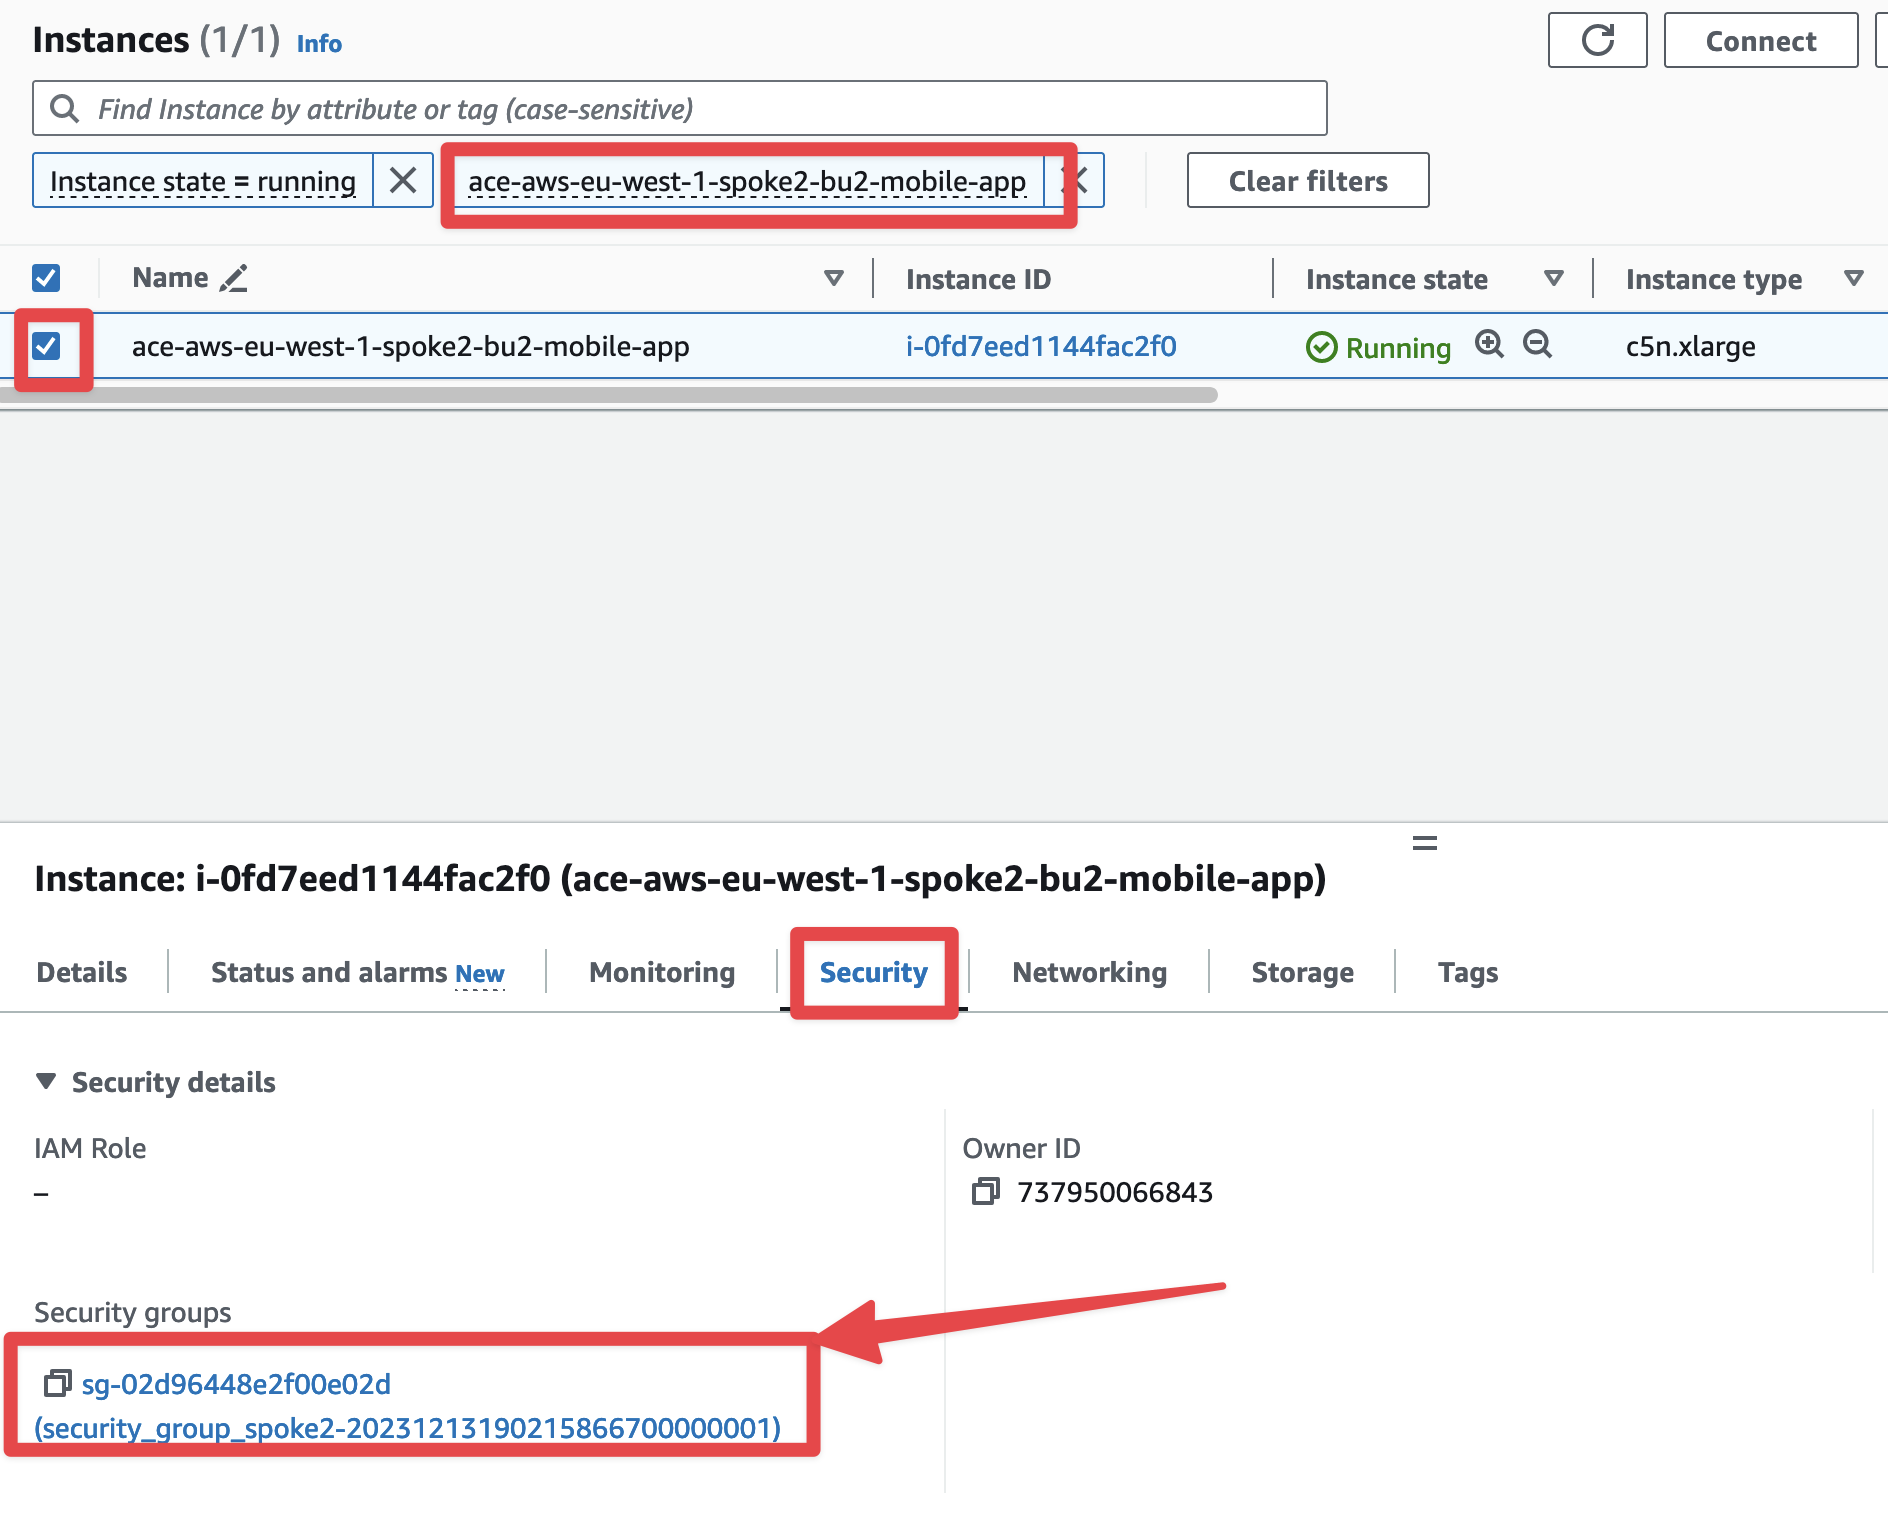
Fig. 45 Select the Security Group#
Explore the inbound rules and you will find out the absence of a rule that should permit the incoming traffic on port tcp/80.

Fig. 46 The Security Group attached to the Mobile App#
Click on "Edit inbound rules".

Fig. 47 Edit the SG#
Click on "Add rule".
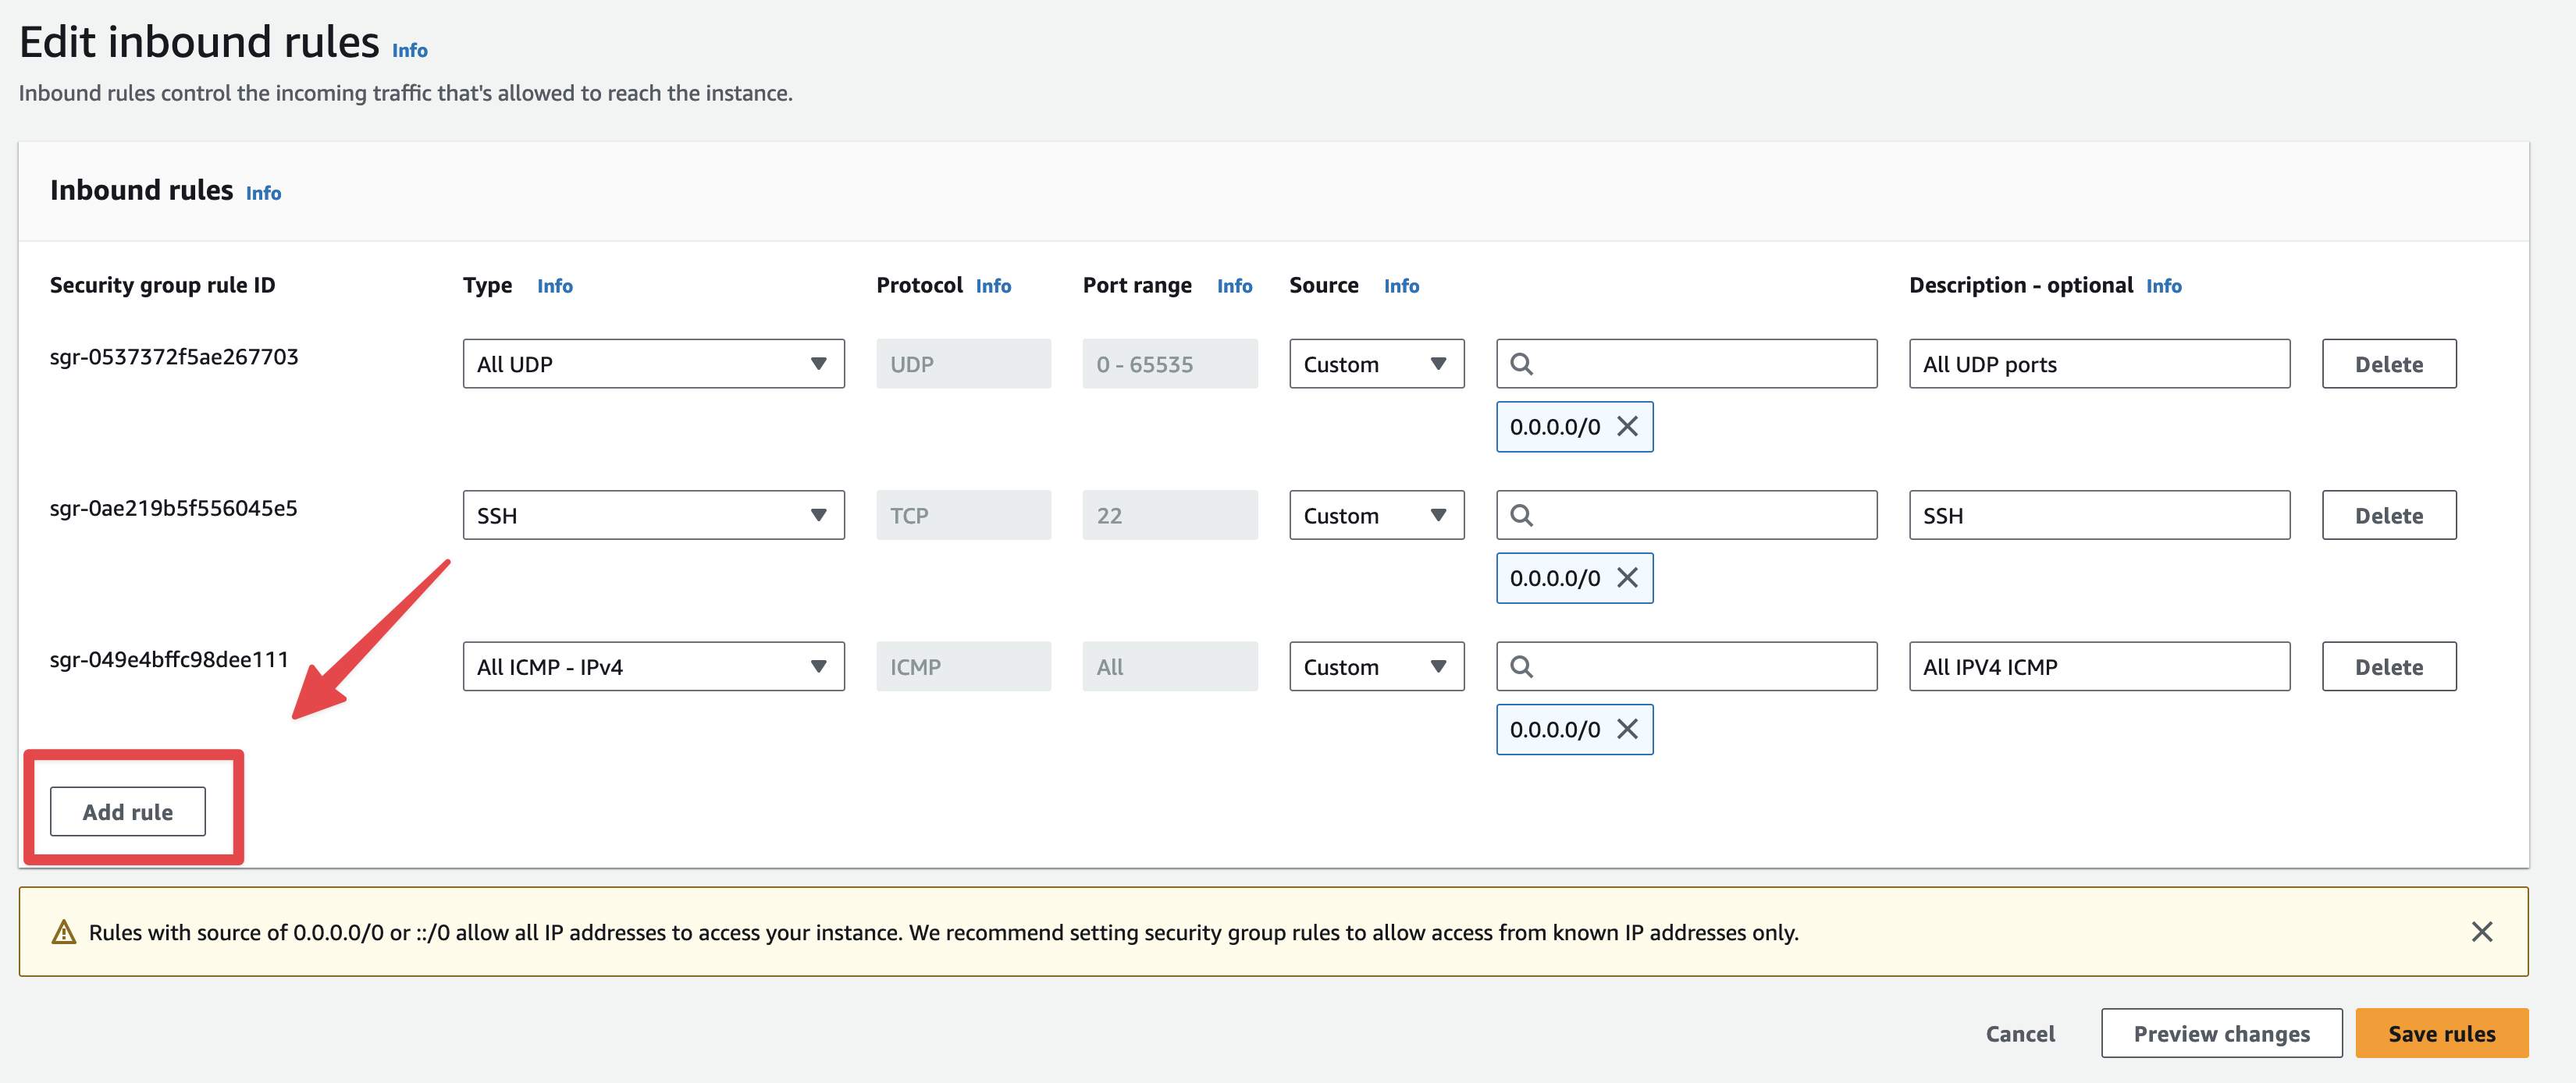
Fig. 48 Add a new rule#
Create the required inbound rule (i.e. “allow http traffic from anywhere”) as depicted below and then click on the "Save rules" button.

Fig. 49 New inbound rule: allow port 80#
Now relaunch the curl command from the BU1 Frontend instance towards the private IP of the BU2 Mobile App.
Curl command will work this time.

Fig. 50 Curl is ok!#
