Lab 8 - SECURE HIGH-PERFORMANCE DATACENTER EDGE#
You are asked to interconnect the on-prem DC in New York to your MCNA. An Aviatrix Edge device has already been provisioned and it got already registered to the existing Aviatrix Controller.
Aviatrix Secure High-Performance Datacenter Edge solution gives power back to the network administrators to deliver cloud connectivity without compromise. The solution delivers encrypted, line-rate performance with single region, multi region, or multi cloud redundancy options and full visibility and troubleshooting capabilities end to end.
1. General Objectives#
Now let’s connect the Aviatrix Edge to the existing MCNA.
First and foremost let’s explore the BGP Map that describes the connectivity established through the BGPoverLAN.
Go to CoPilot > Diagnostics > Cloud Routes > BGP info and click on the three dots icon and select the "Show BGP Map" option.

Fig. 252 CoPilot BGP Map#
You can notice both the AS numbers of each side of the connection and the /30 subnet used in the underlay.
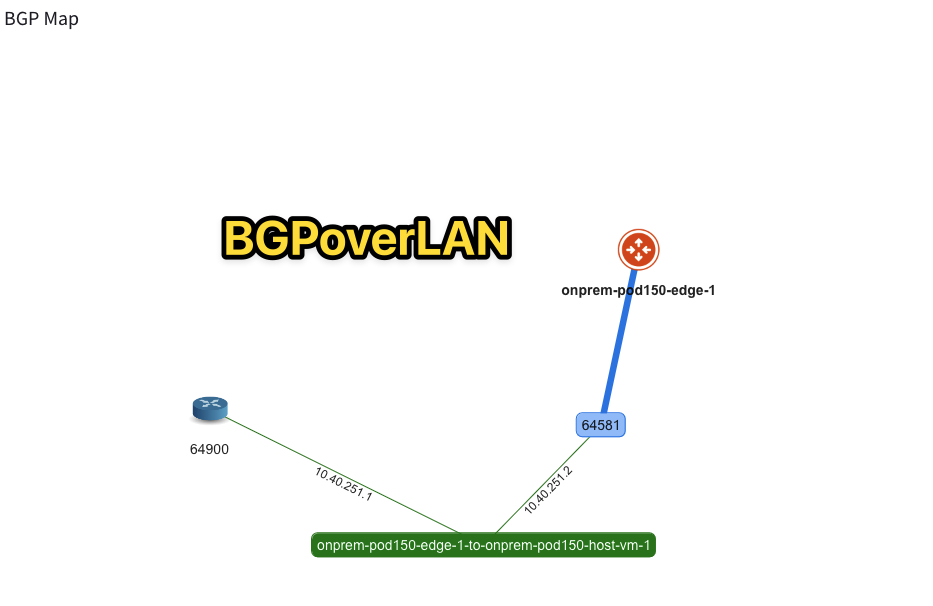
Fig. 253 BGPoverLAN inside the On-Prem DC#
Close the BGP Map and then click again on the threee dots icon and this time select the "Show BGP Learned Routes".
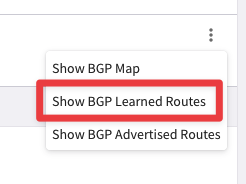
Fig. 254 Show BGP Learned Routes#
The LAN router is advertising 225 routes to the Aviatrix Edge.
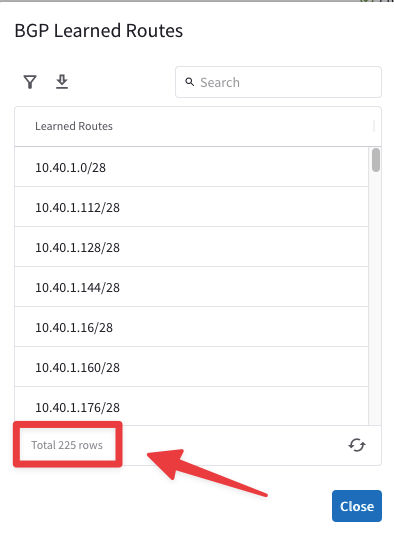
Fig. 255 225 Routes#
If you check also the "Show BGP Advertised Routes" outcome, you will notice that the Aviatrix Edge is not advertising any routes, because it is not connected to the MCNA yet!
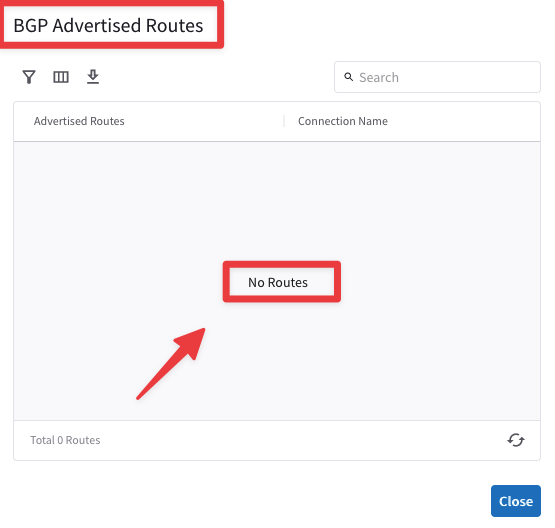
Fig. 256 No routes advertised by the Edge yet#
6.1. Attachment between Edge and the Transit#
Let’s establish a peering between the Aviatrix Edge device and the Transit Gateway in US-EAST-2.
In the Topology depicted below, you will notice that there is a workstation named “edge” attached to the LAN router. Once the attachment has been established, you will launch your ping from that client, for the connectivity verification!
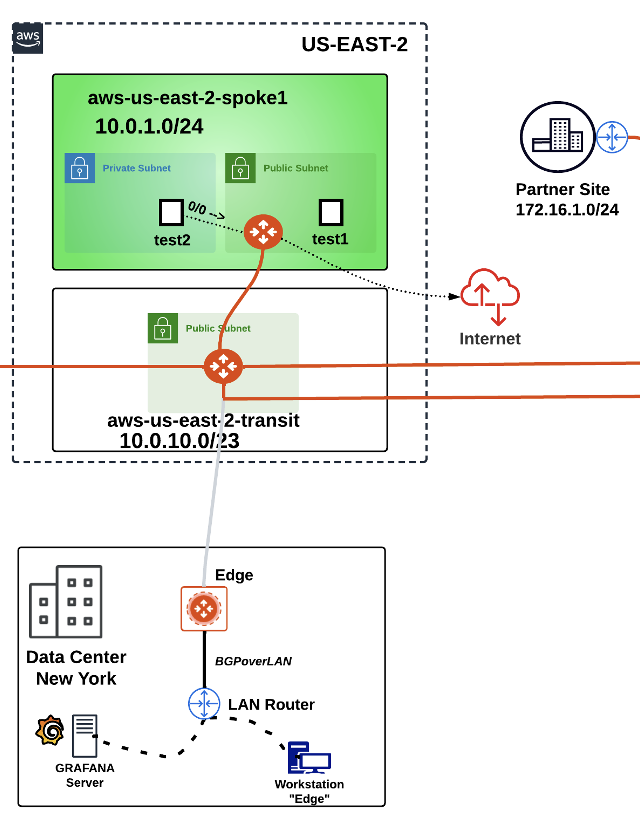
Fig. 257 Peerings not established yet!#
First and foremost, you have to configure a BGP ASN on the aws-us-east-2-transit GW!
Go to CoPilot > Cloud Fabric > Gateways > Transit Gateways and click on the aws-us-east-2-transit.
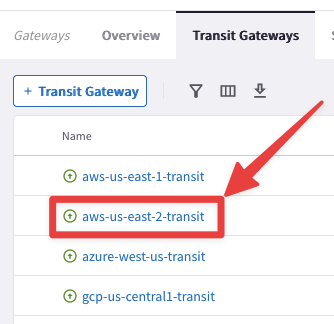
Fig. 258 aws-us-east-2-transit#
Select the "Settings" tab and then expand the "Border Gateway Protocol (BGP)" section and insert the AS number 64513 on the empty field related to the “Local AS Number”, then click on Save.
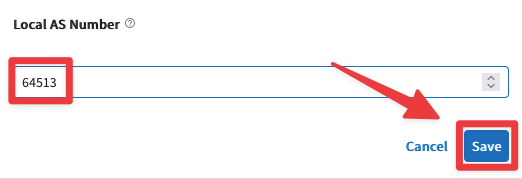
Fig. 259 BGP ASN#
Now it’s time to establish the attachment!
Go to CoPilot > Cloud Fabric > Hybrid Cloud > Edge Gateways and click on the "Manage Transit Gateway Attachment" button, on the right-hand side of the screen.

Fig. 260 Manage Transit Gateway Attachment#
Click on the "+Attachment" button.
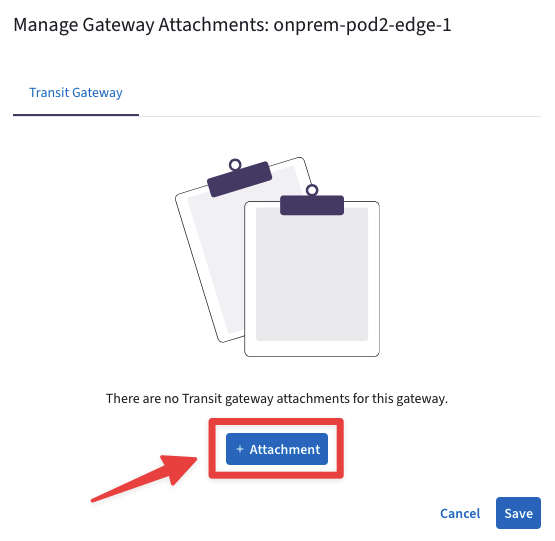
Fig. 261 Transit Gateway Attachment#
Fill in the attachment template using the following settings:
Transit Gateway: aws-us-east-2-transit
Local Edge Gateway Interfaces: WAN(etho)
Attach over: Public Network
High Performance Encryption: OFF
Do not forget to click on Save.
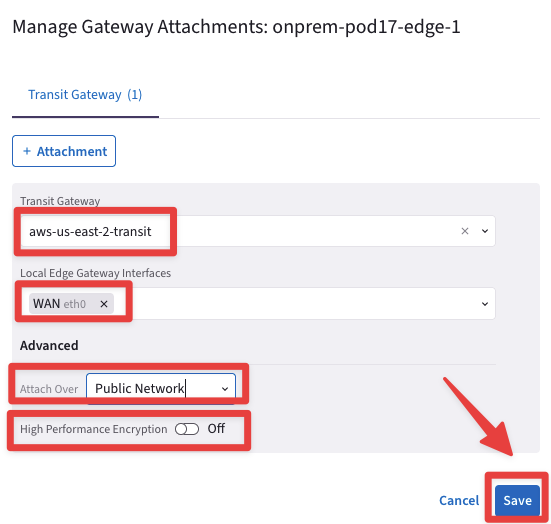
Fig. 262 Attachment creation template#
Wait for a bunch of seconds for the Aviatrix Controller to establish the attachment and then a message will pop up confirming that the operation has been accomplished, successfully!

Fig. 263 Peering created#
Let’s verify the presence of the attachment previously created on the Topology.
Go to CoPilot > Cloud Fabric > Topology > Overview (default).
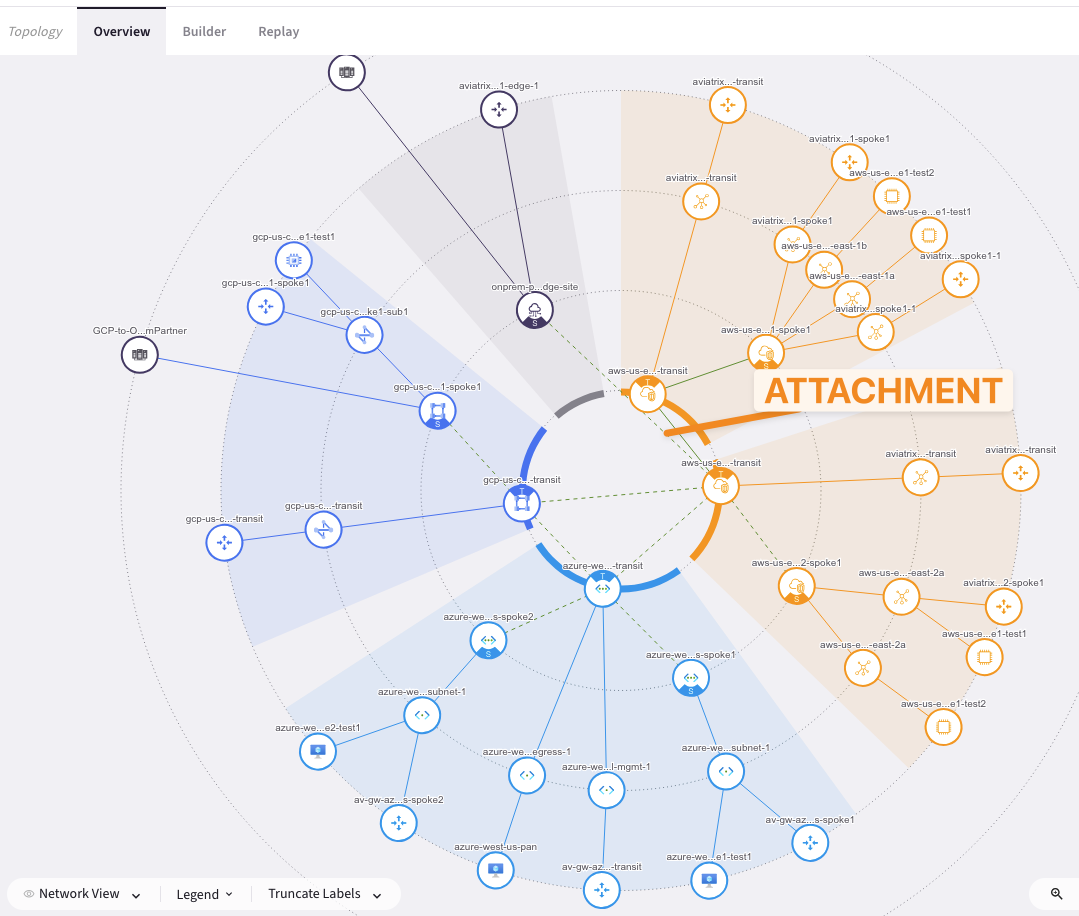
Fig. 264 New attachment#
Go to CoPilot > Cloud Fabric > Gateways > Transit Gateways and click on the aws-us-east-2-transit cluster.
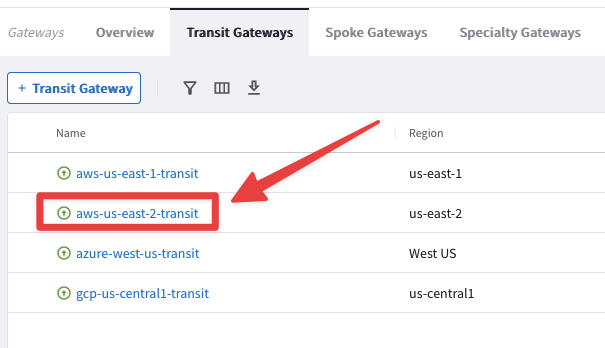
Fig. 265 aws-us-east-2-transit#
Select the "Attachments" tab and then click on "Transit-Edge Peering". You will notice this additional tab that confirms the presence of an attachment between the Transit GW in the cloud and the Edge running in the DC!
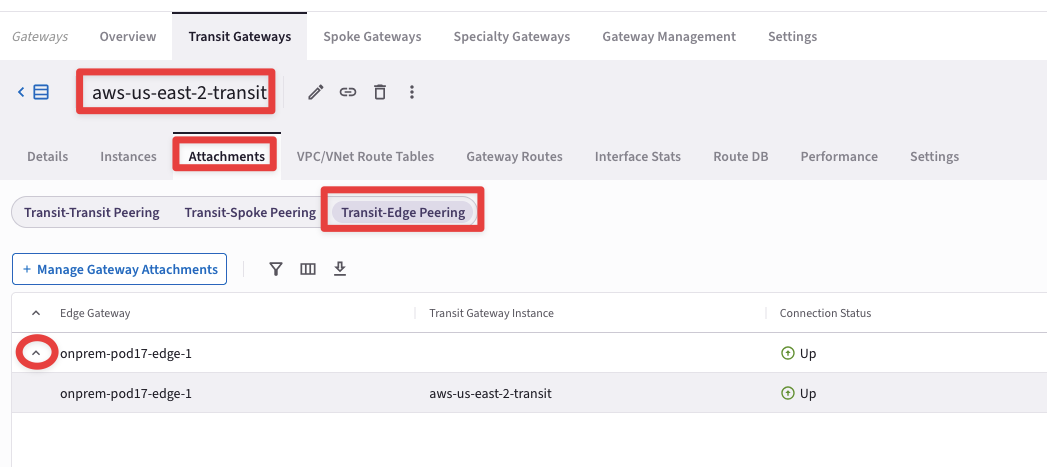
Fig. 266 Transit-Edge Peering#
This is how the Topology would look like after the creation of the attachment.
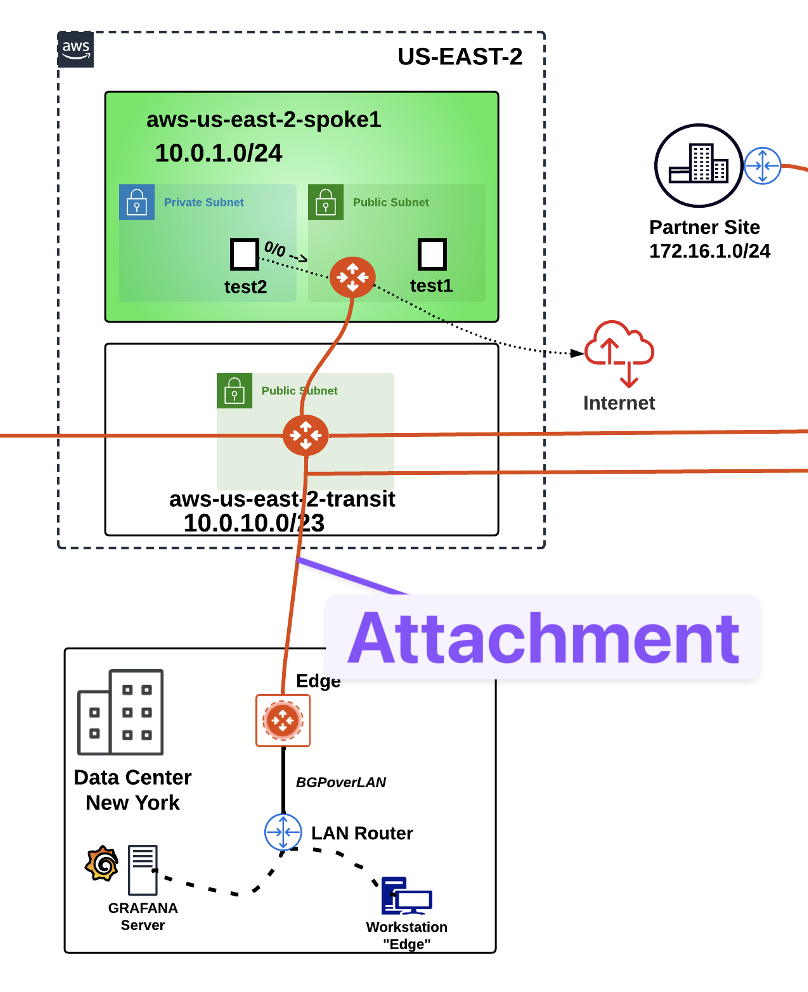
Fig. 267 Attachment established!#
The Edge devices allows to extend all the Aviatrix functionalities to the remote DC!
6.2. Network Domain Association#
Let’s assocciate the Edge connection to any of the existing Network Domains.
Go to CoPilot > Networking > Network Segmentation > Network Domains and edit, for instance, the Green domain. Select the on-prem-edge connection and do not forget to click on Save!
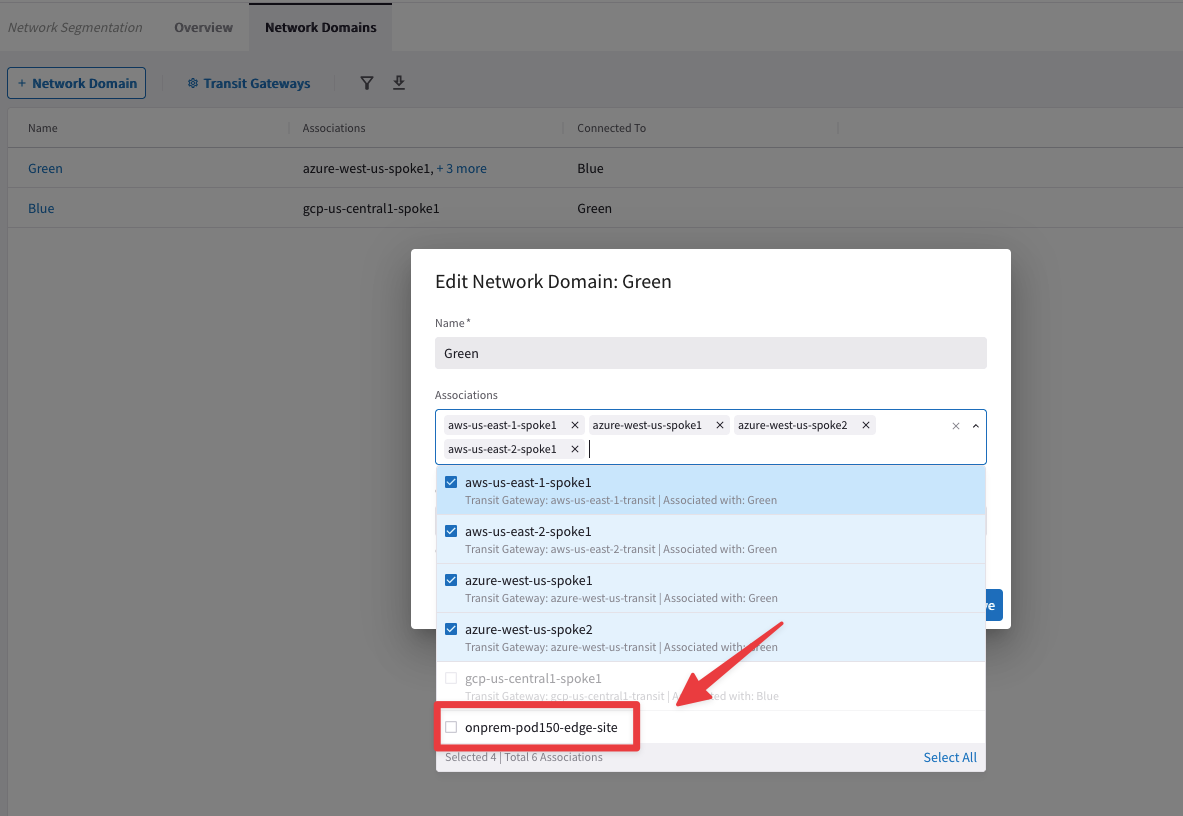
Fig. 268 Network Domain Association#
You have successfully extended the Network Segmentation on top of the DC.
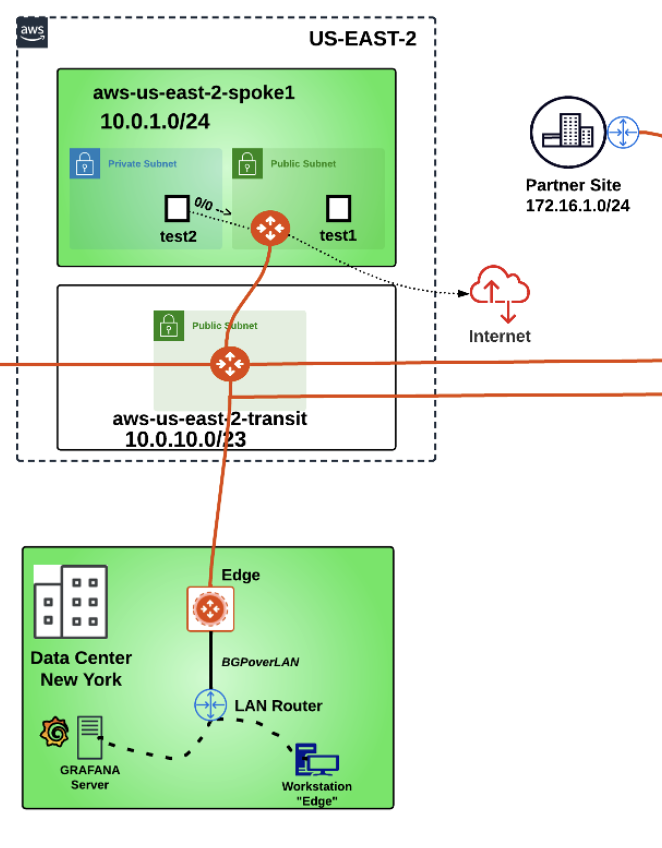
Fig. 269 The DC is now another VPC#
Let’s explore again the Cloud Routes section!
Go to CoPilot > Diagnostics > Cloud Routes > BGP info and click on the three dots icon and select the "Show BGP Advertised Routes option.
Important
This time you will notice that the Edge device is advertising all the MCNA CIDRs to the LAN router! Those routes got installed into the Edge device by the Aviatrix Controller, after the attachemnt got established!
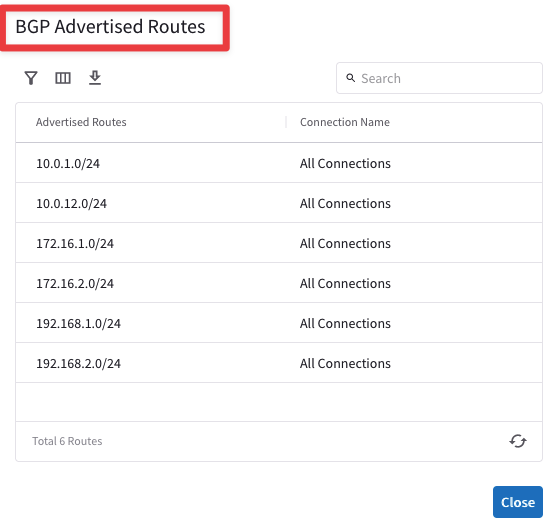
Fig. 270 BGP Advertised Routes#
6.3. Edge: Connectivity Test#
Let’s launch a connectivity test, from the Workstation “Edge” inside the DC in New York.
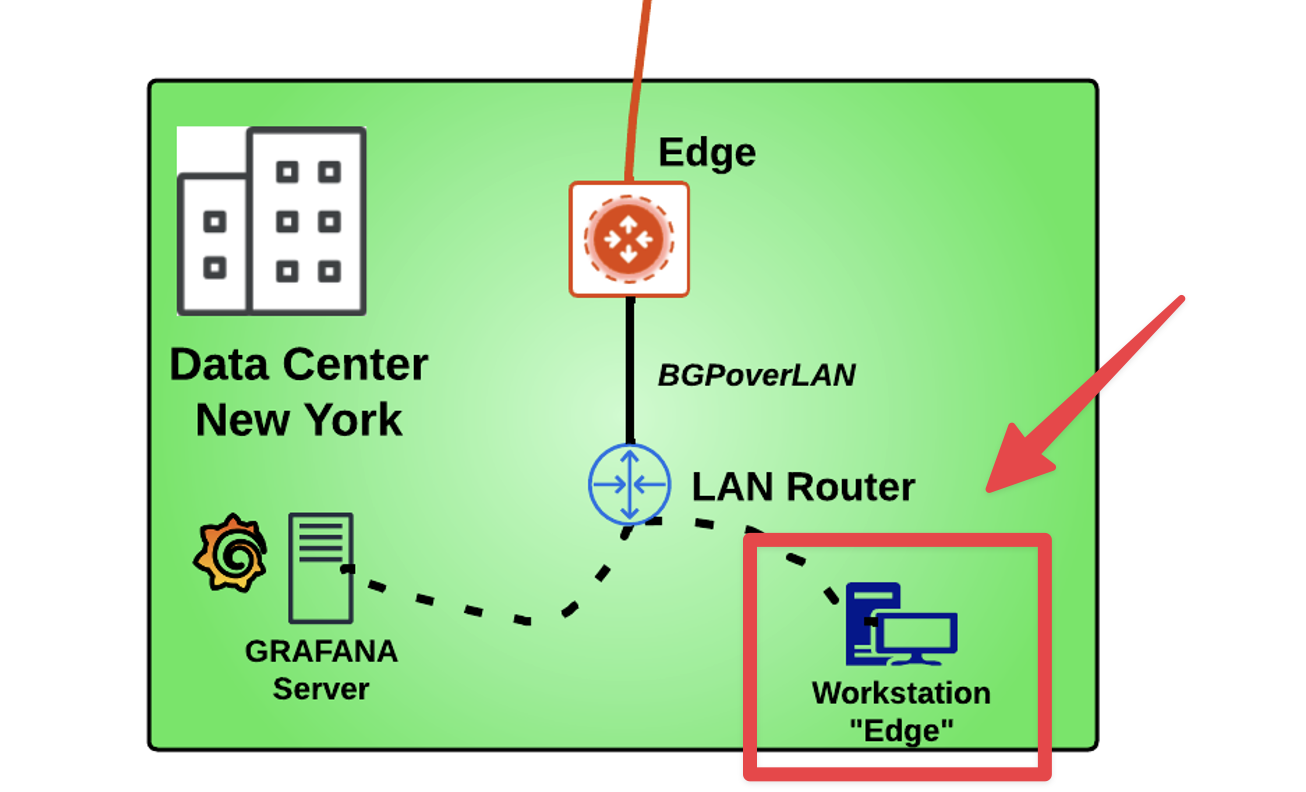
Fig. 271 BGP Advertised Routes#
Go to your personal POD portal, scroll down untill your reach the Lab 8 section and click on the "Open Workstation" button.

Fig. 272 Workstation Edge access from the POD Portal#
Subsequently, insert the credentials available from the POD Portal.
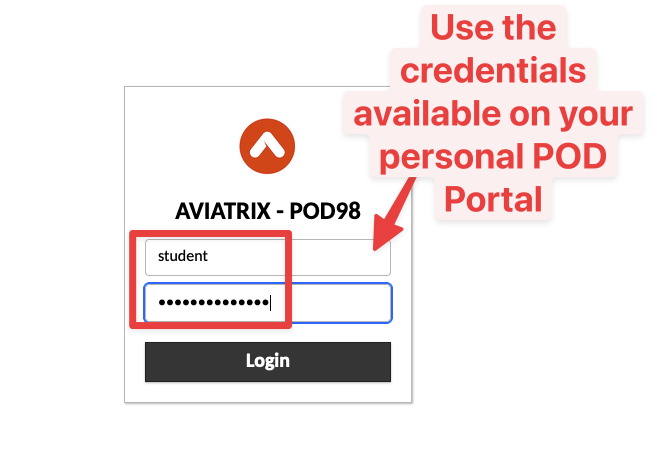
Fig. 273 Workstation Edge credentials#
You will land on the Desktop of the Workstation Edge and from here launch the LX Terminal.
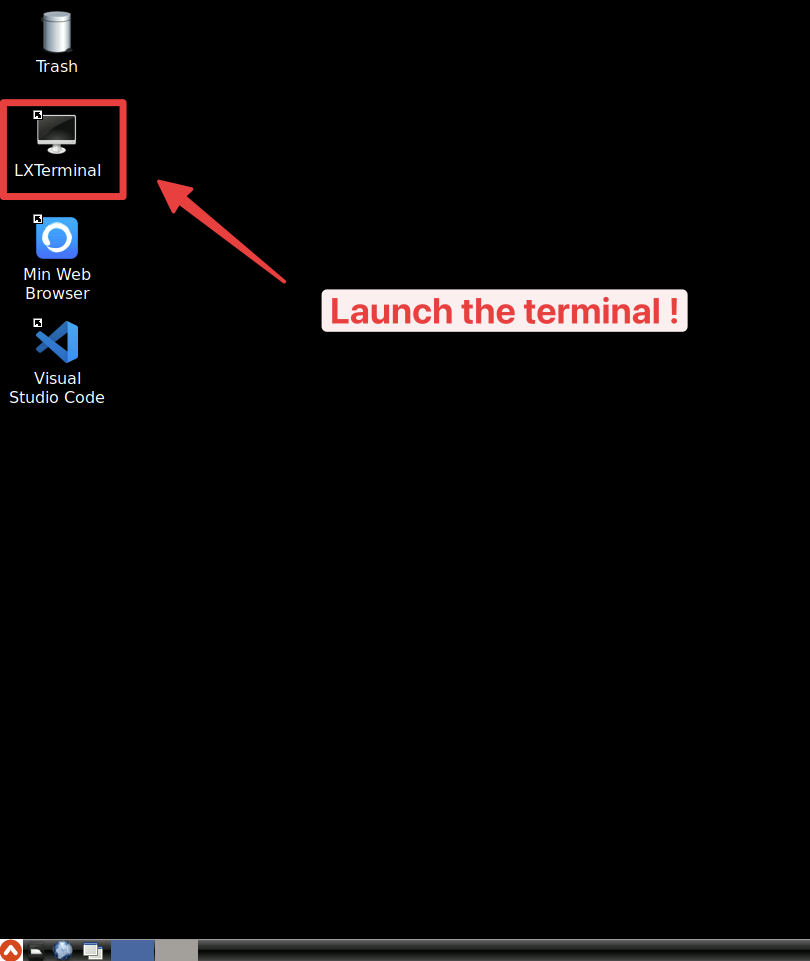
Fig. 274 LX Terminal#
Now execute the ping command towards the private IP address of the aws-us-east-2-spoke1-test1 instance.
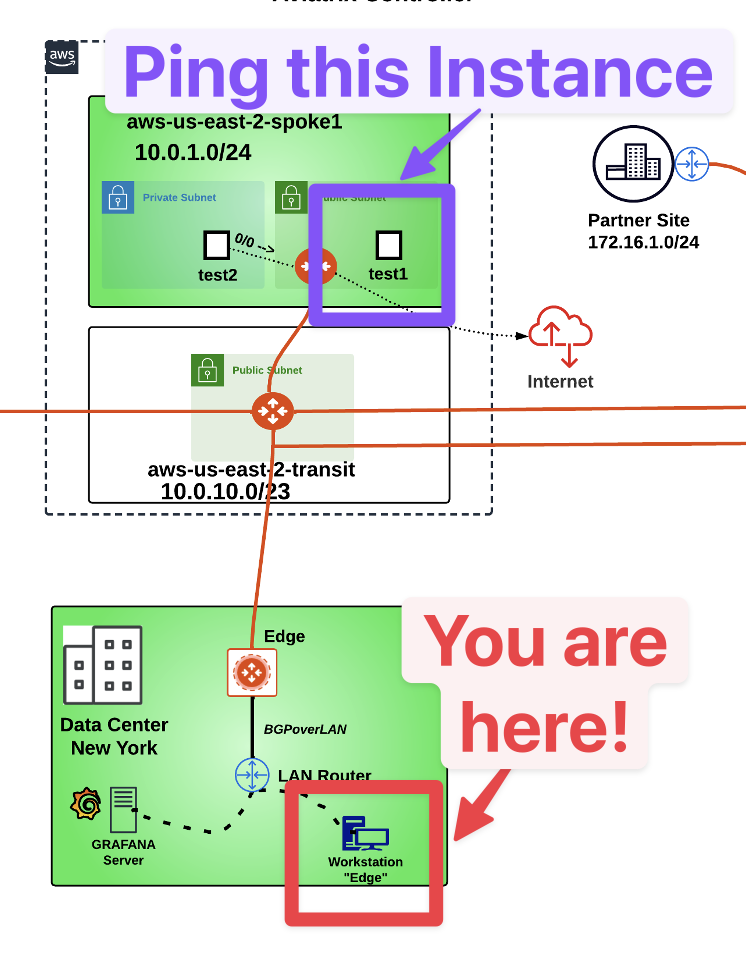
Fig. 275 Target for the connectivity test#
The ping will be successful, this means that you have extended the Aviatrix MCNA to your on-prem DC, that ultimately can now be considered as just an additional VPC!
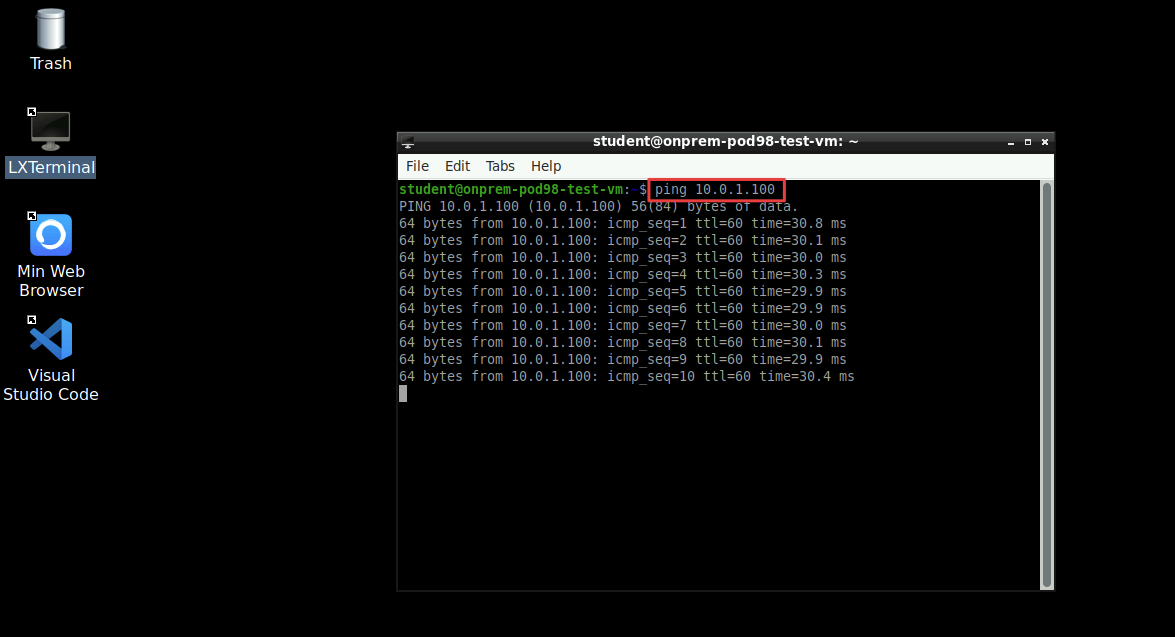
Fig. 276 Ping#
6.3. Edge: FlowIQ#
Use FlowIQ from the Aviatrix CoPilot, for inspecting the NetFlow Data.
Tip
Go to CoPilot > Monitor > FlowIQ, click on the "+" icon and filter based on the "Destination IP Address" 10.0.1.100 (i.e. aws-us-east-2-spoke1-test1).
Do not forget to click on Apply.
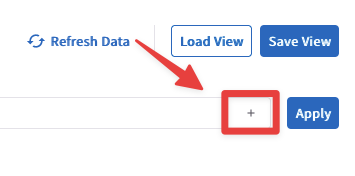
Fig. 277 Create the filter#

Fig. 278 FlowIQ Filter#
Caution
It may take about 5 minutes for flow data to appear in the CoPilot UI, therefore please wait for a bit
and then click on the "Refresh Data" button!

Fig. 279 Refresh#
Then scroll a little bit and check the "Flow Exporters" widget, then from the drop-down menu select the "Aviatrix Gateway" widget: you will see the list of all the Aviatrix Gateways involved along the path.
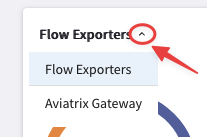
Fig. 280 Widget#
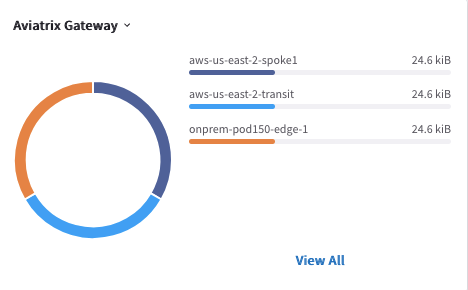
Fig. 281 Aviatrix Gateway#
Note
On the Aviatrix Gateway widget, the very first gateway from the list is the gateway with the highest traffic (in KibiBytes).
6.4. Edge: “It’s more than a Spoke GW””#
The Aviatrix Edge device is capable to be connected to multiple Transit Gateways, simultaneously, thus the Edge device is regarded much more than a classic Spoke gateway.
Let’s connect the Edge device also to the Transit Gateway in US-Central-1 in GCP.
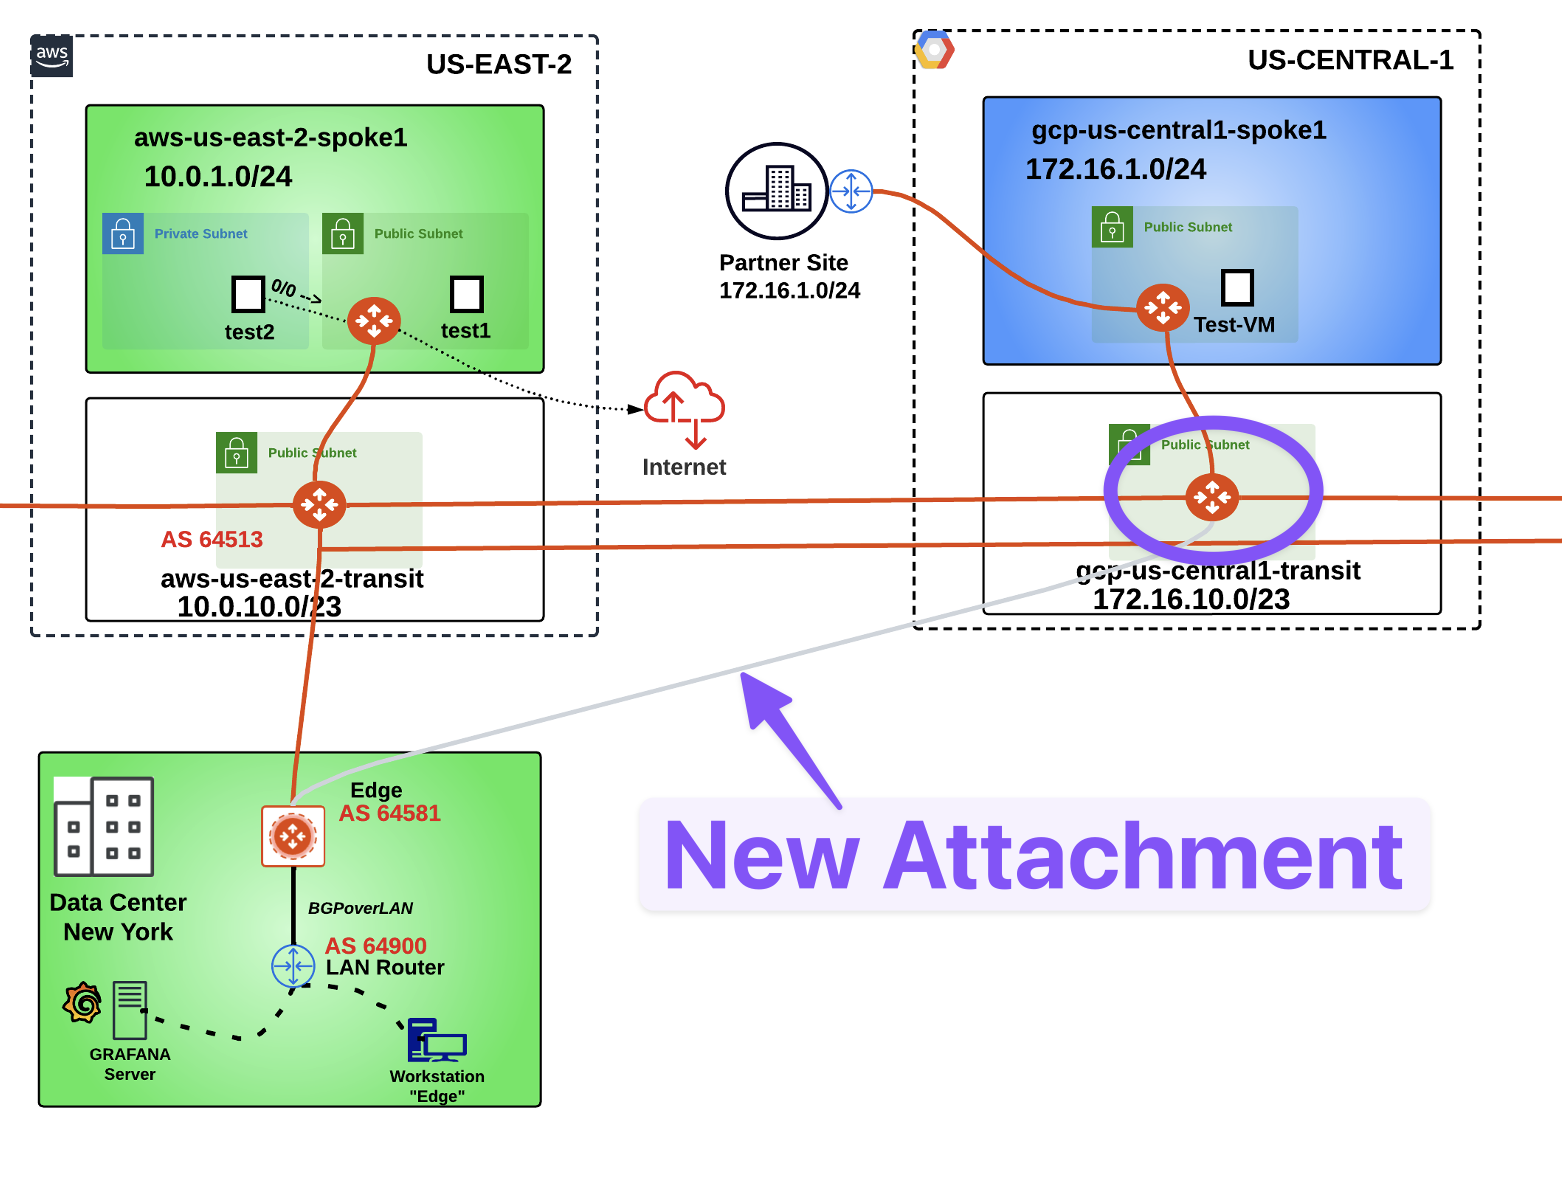
Fig. 282 New Attachment towards GCP#
Once again, you have to configure a BGP ASN on the gcp-us-central1-transit GW first, before deploying any new attachments.
Go to CoPilot > Cloud Fabric > Gateways > Transit Gateways and click on the gcp-us-central1-transit.
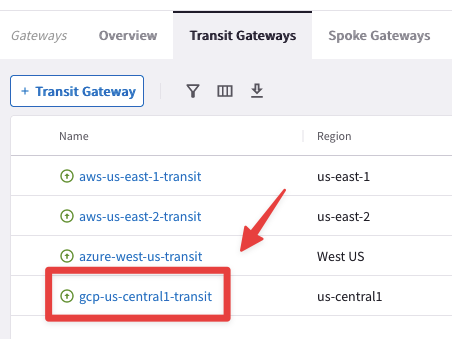
Fig. 283 gcp-us-central1-transit#
Select the "Settings" tab and then expand the "Border Gateway Protocol (BGP)" section and insert the AS number 64514 on the empty field related to the “Local AS Number”, then click on Save.
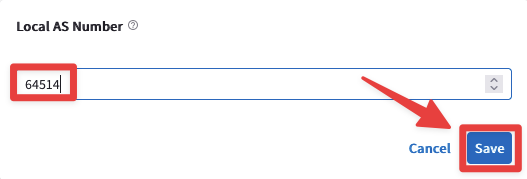
Fig. 284 BGP ASN#
Now you are ready to proceed with the rest of the configuration on the Edge section!
Go to CoPilot > Cloud Fabric > Hybrid Cloud > Edge Gateways and click on the "Manage Transit Gateway Attachment" button, on the right-hand side of the screen.

Fig. 285 Manage Transit Gateway Attachment#
Now click on the "+ Attachment" button.
You will notice the existing attachment (grayedout) with the Transit Gateway in AWS US-East-2.
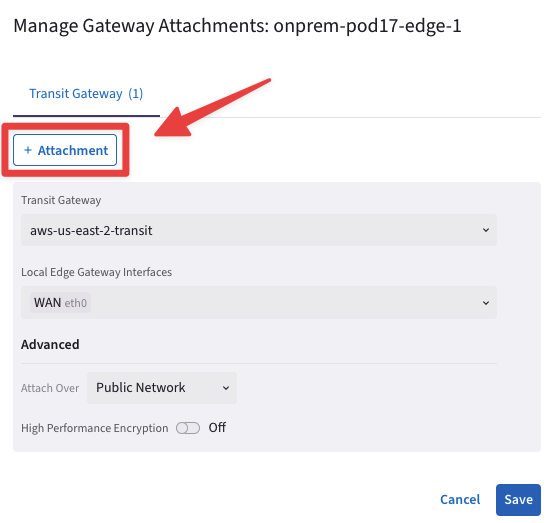
Fig. 286 New Attachment#
Fill in the attachment template using the following settings:
Transit Gateway: gcp-us-central1-transit
Local Edge Gateway Interfaces: WAN(etho)
Attach over: Public Network
High Performance Encryption: OFF
Do not forget to click on Save.
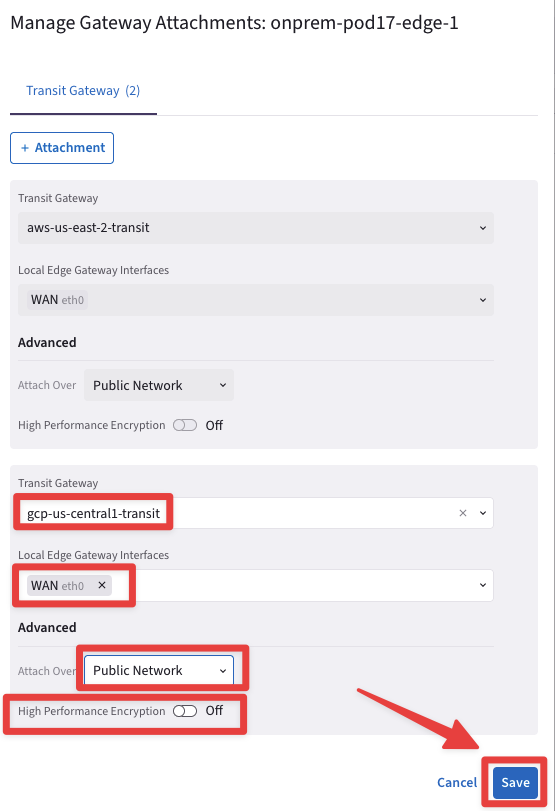
Fig. 287 Edge Attachment Template#
Wait for 1 minute for the Aviatrix Controller to establish the attachment between the Edge and the GCP Transit Gateway. Once the operation is completed you will be notified!

Fig. 288 Notification#
Let’s verify the presence of the new attachment previously created on the Topology.
Go to CoPilot > Cloud Fabric > Topology > Overview (default).
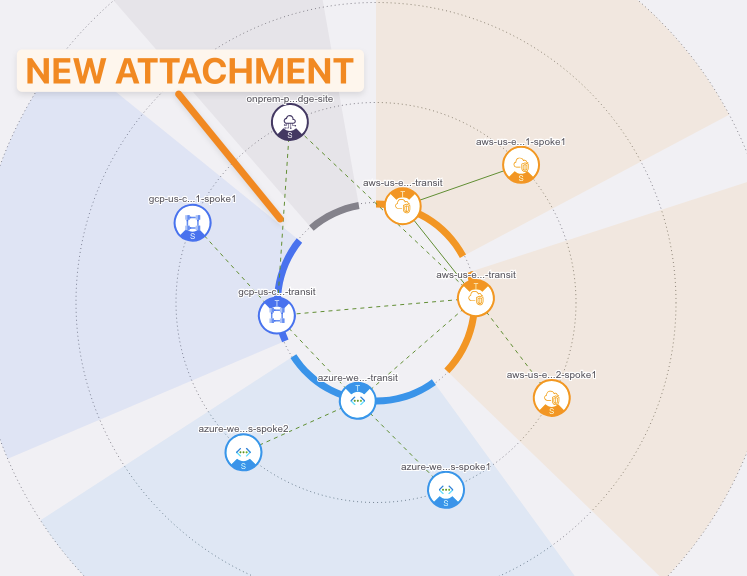
Fig. 289 Topology#
6.4.1 Edge: As-Path Prepend#
Now, let’s SSH on the EC2 aws-us-east-2-spoke1-test1 and then launch the command traceroute towards the VM gcp-us-central1-spoke1-test1 in GCP
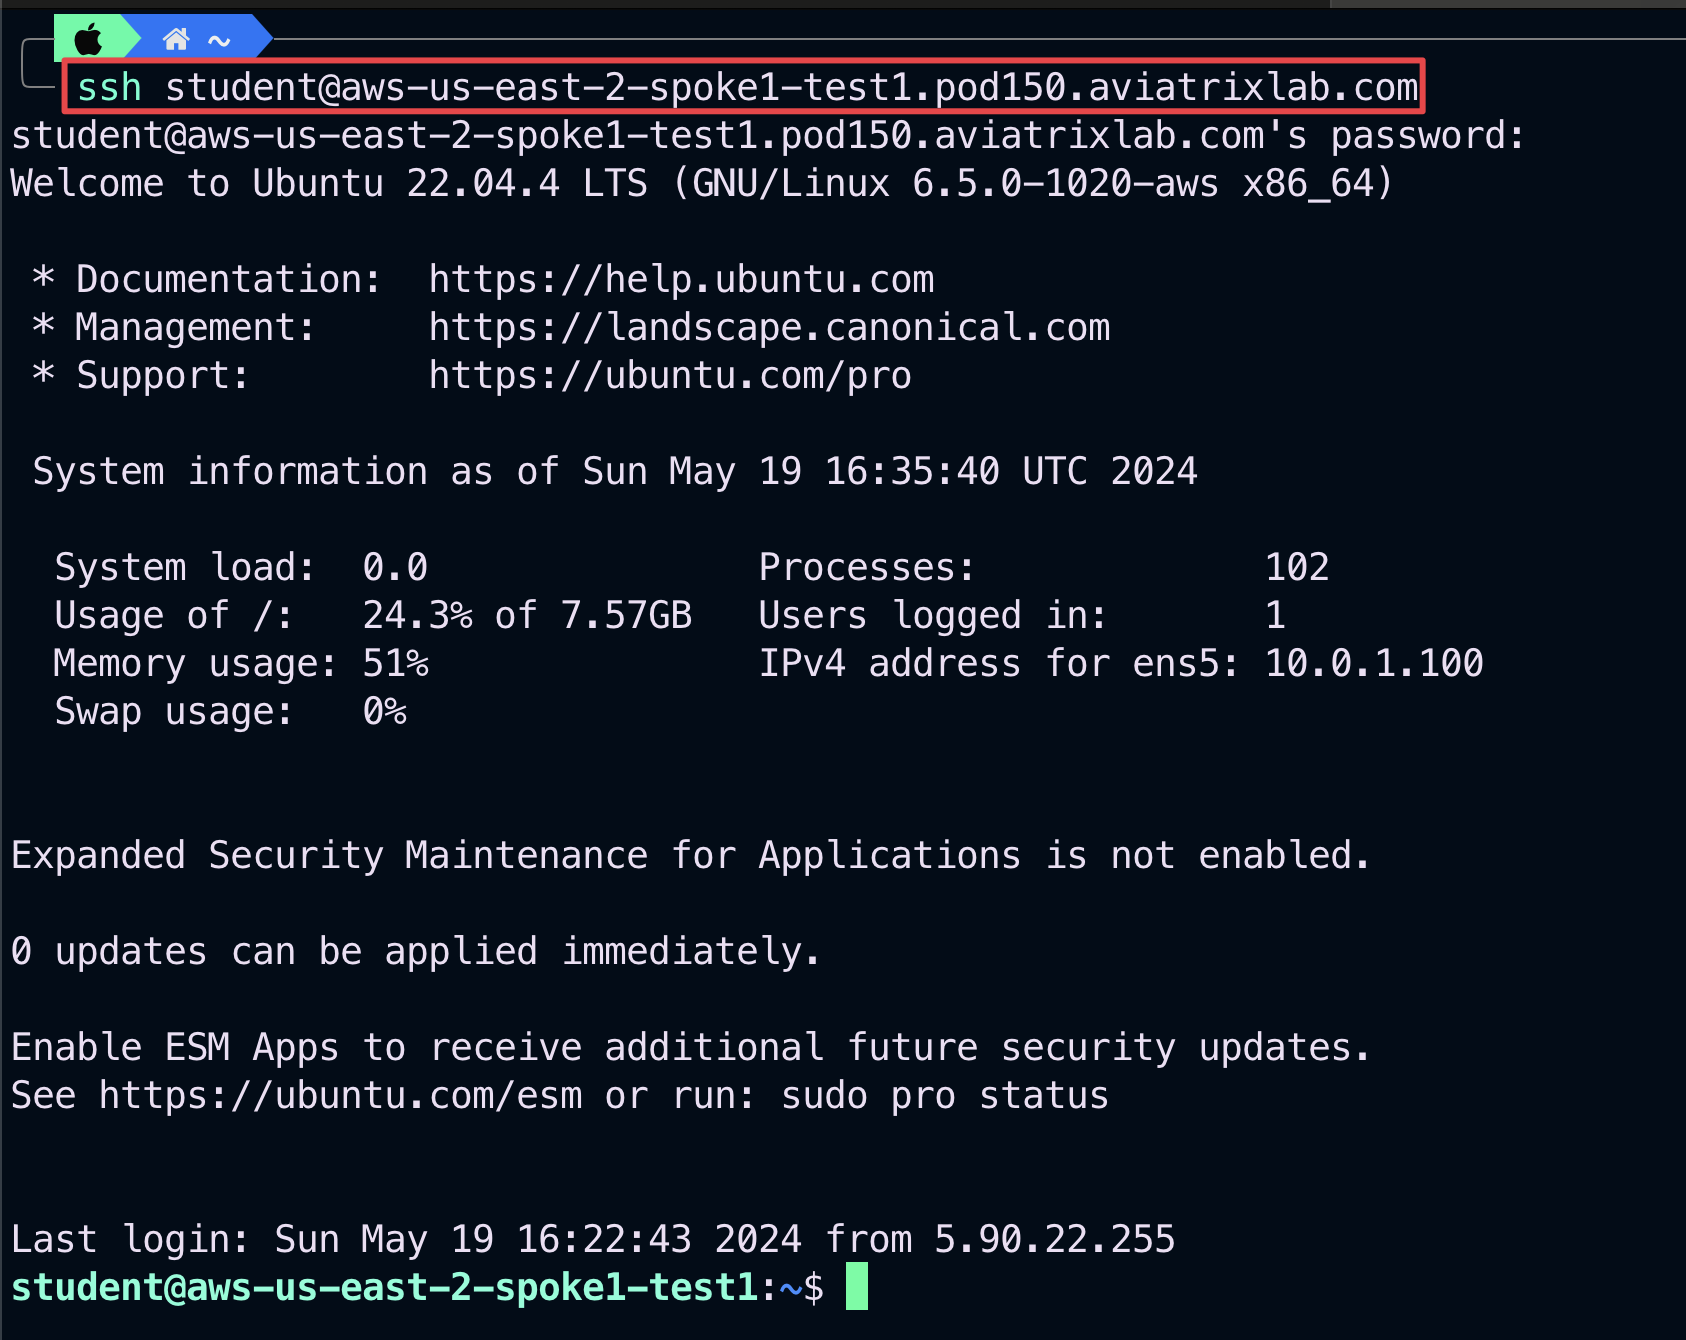
Fig. 290 aws-us-east-2-spoke1-test1#
Install the
inetutils-traceroutepackage, typing the following command:
sudo apt install inetutils-traceroute
Caution
You will be asked to type the student’s password!

Fig. 291 inetutils-traceroute#
When you see this pop-up message, just click on the Enter button on your keyboard!
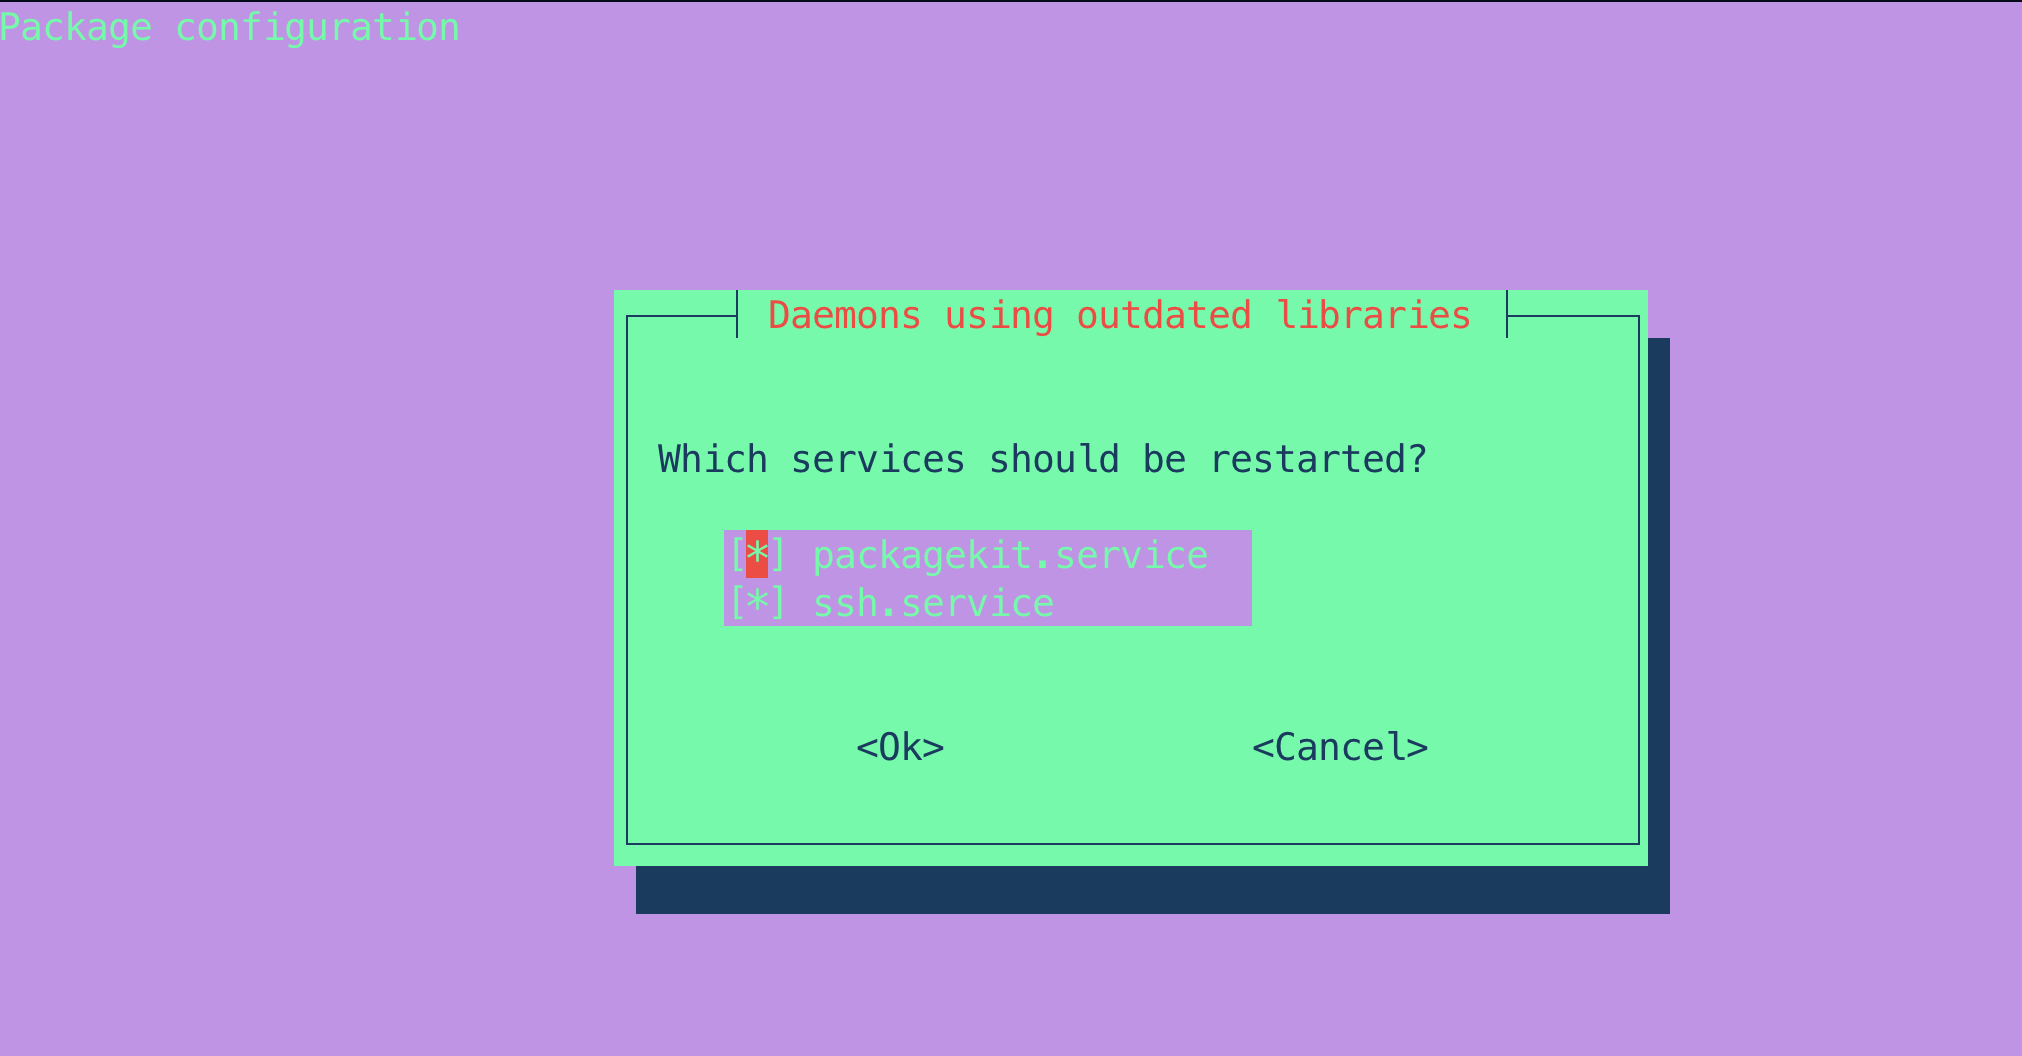
Fig. 292 confirm#
Now type the traceroute command towards the test VM in GCP:
traceroute 172.16.1.100

Fig. 293 Traceroute#
The traceroute will reveal that the destination is exactly 5 hops away.
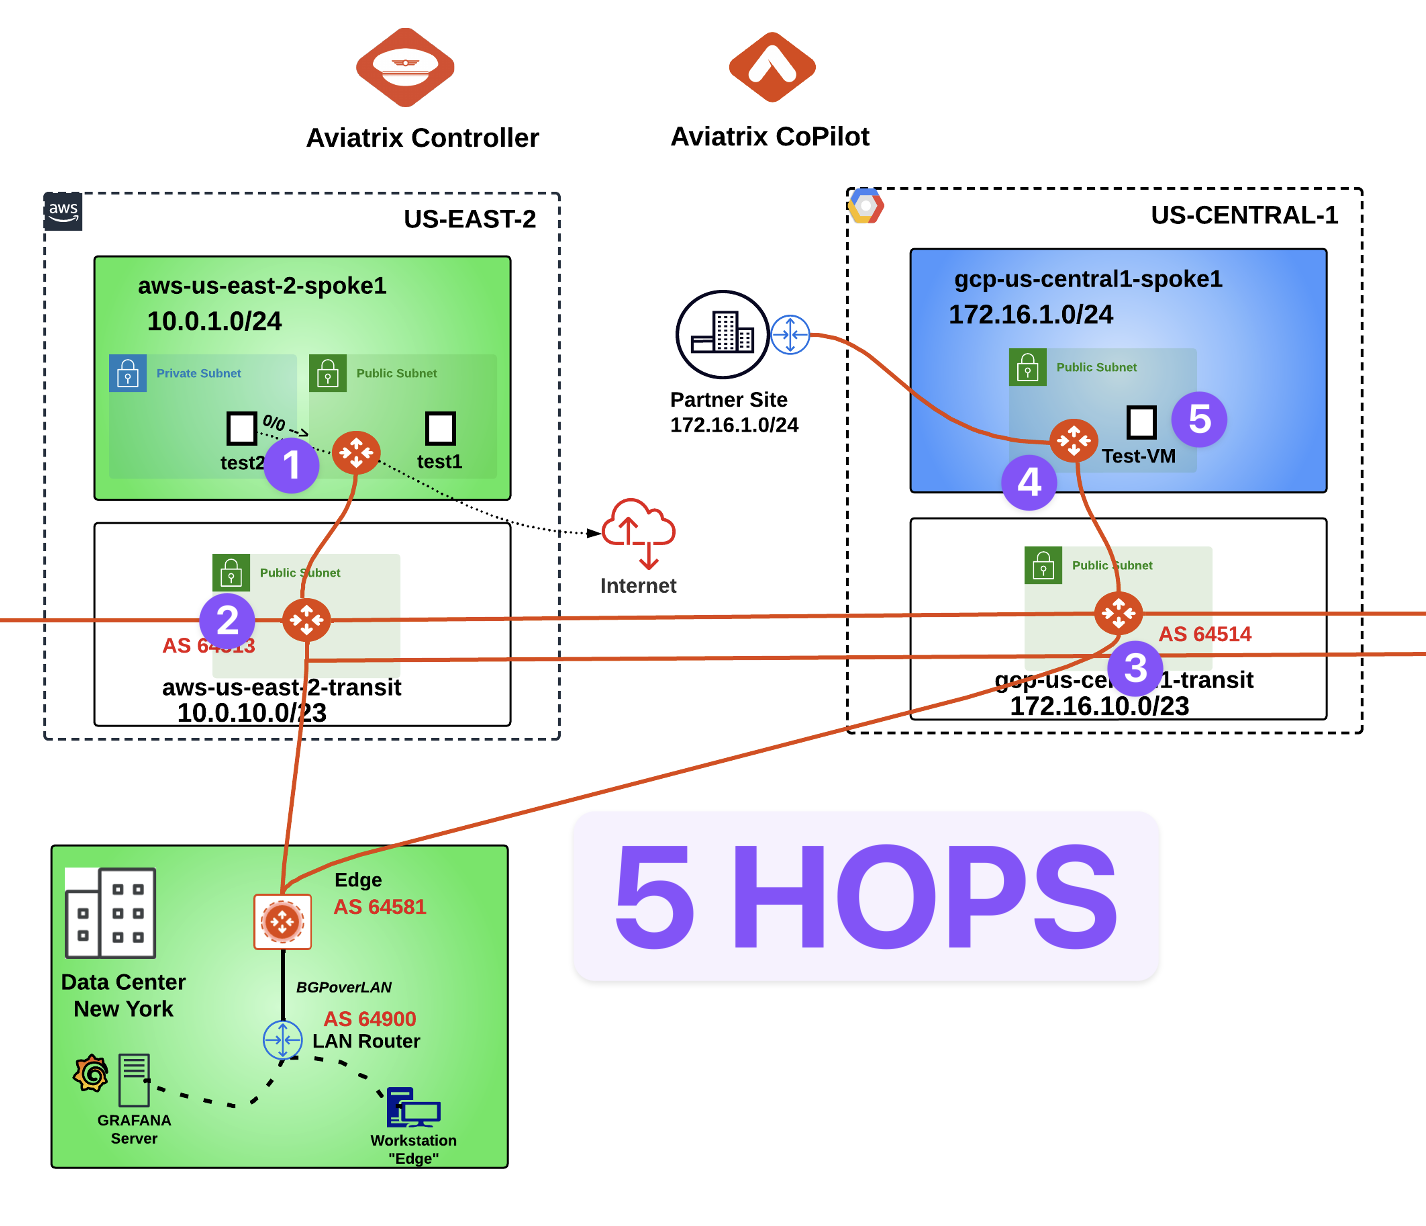
Fig. 294 5 hops#
Let’s harness the as-path prepend feature for manipulating the traffic.
Important
The routes exchanged between transit gateways are considered BGP-like routes! This is because the Aviatrix Controller orchestrating the SD routing, also has to use a mechanism for the routing decision, and therefore these routes seem BGP routes, indeed they have some attributes similar to the attributes used with BGP routes. For instance, each Transit has its own AS PATH, and this is used for the best path selection process. Nevertheless, bear in mind that the control plane within the MCNA is based on SDN (Software Defined Networking).
The objective of this task is to define a Primary path through the Edge device, whereas the path between the Transit gateways will be used as a Backup path.
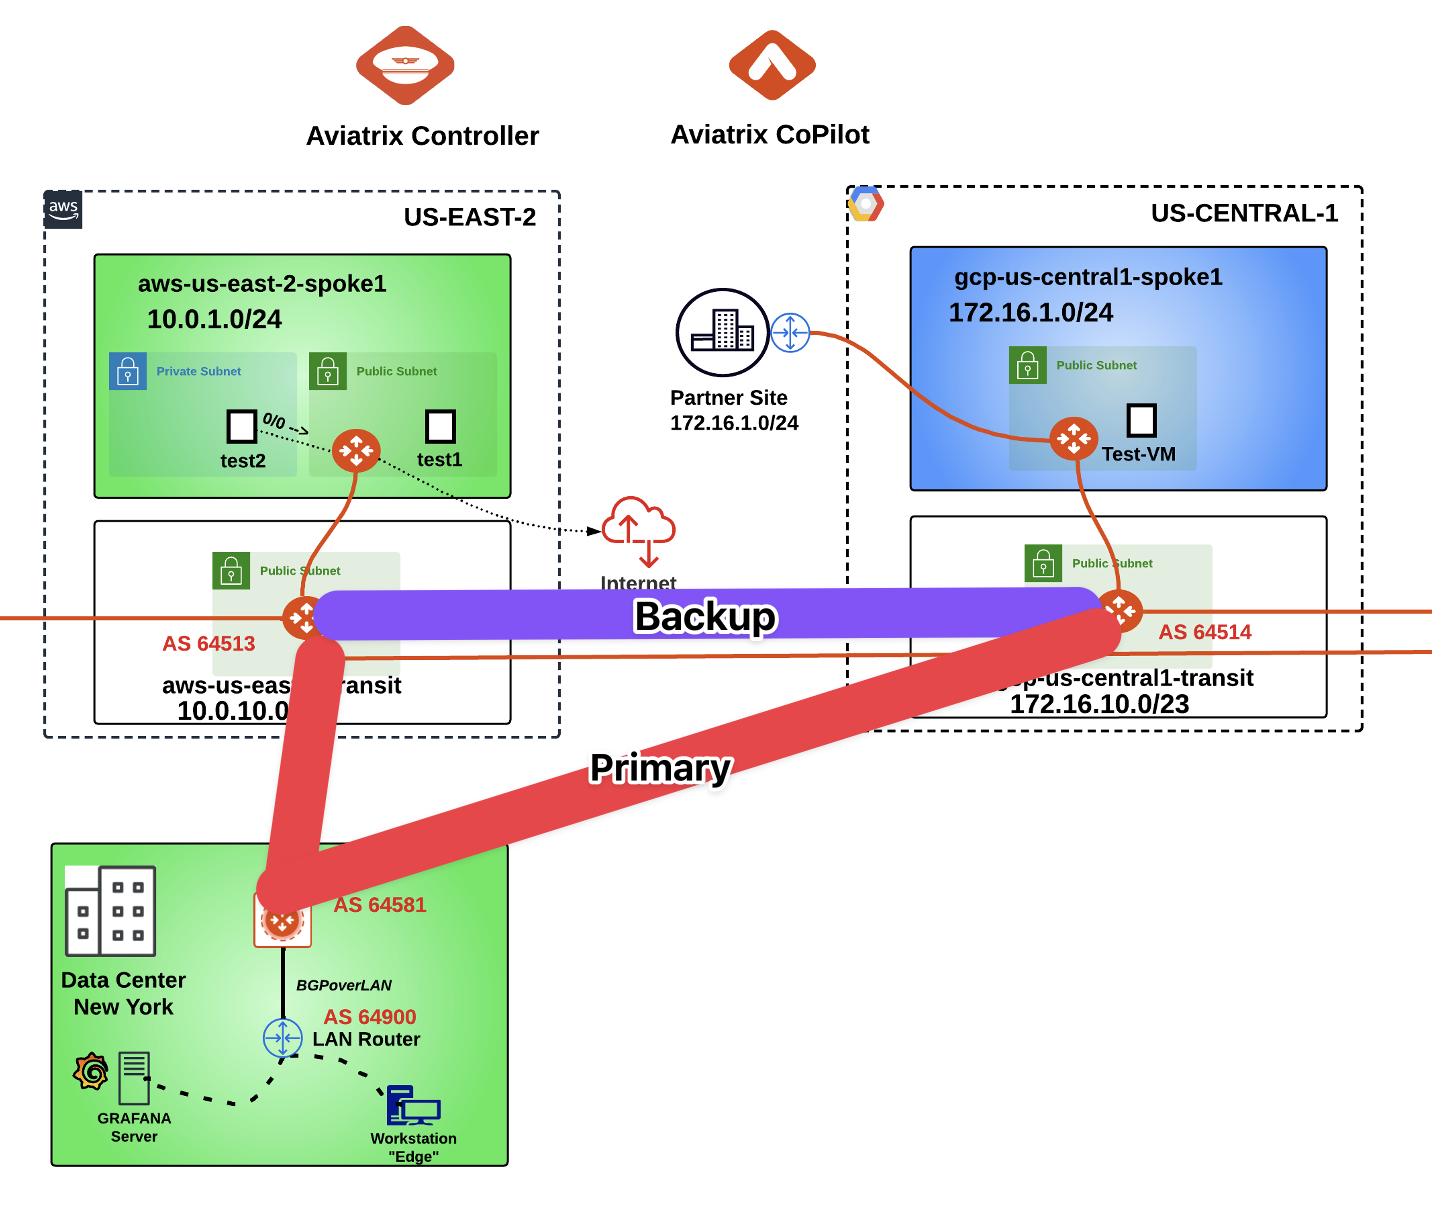
Fig. 295 Primary and Backup#
Let’s first check the Route DB of the aws-us-east-2-transit GW.
Go to CoPilot > Cloud Fabric > Gateways > Transit Gateways and select the aws-us-east-2-transit Gateway.
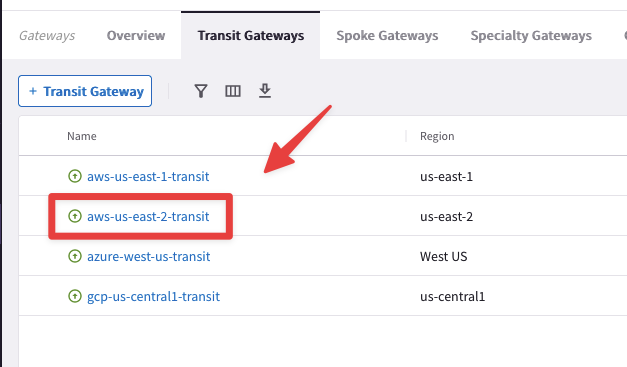
Fig. 296 aws-us-east-2-transit#
Select the "Route DB" tab, then on right-hand side type 172.16.1.0 on the Search field.

Fig. 297 Route DB#
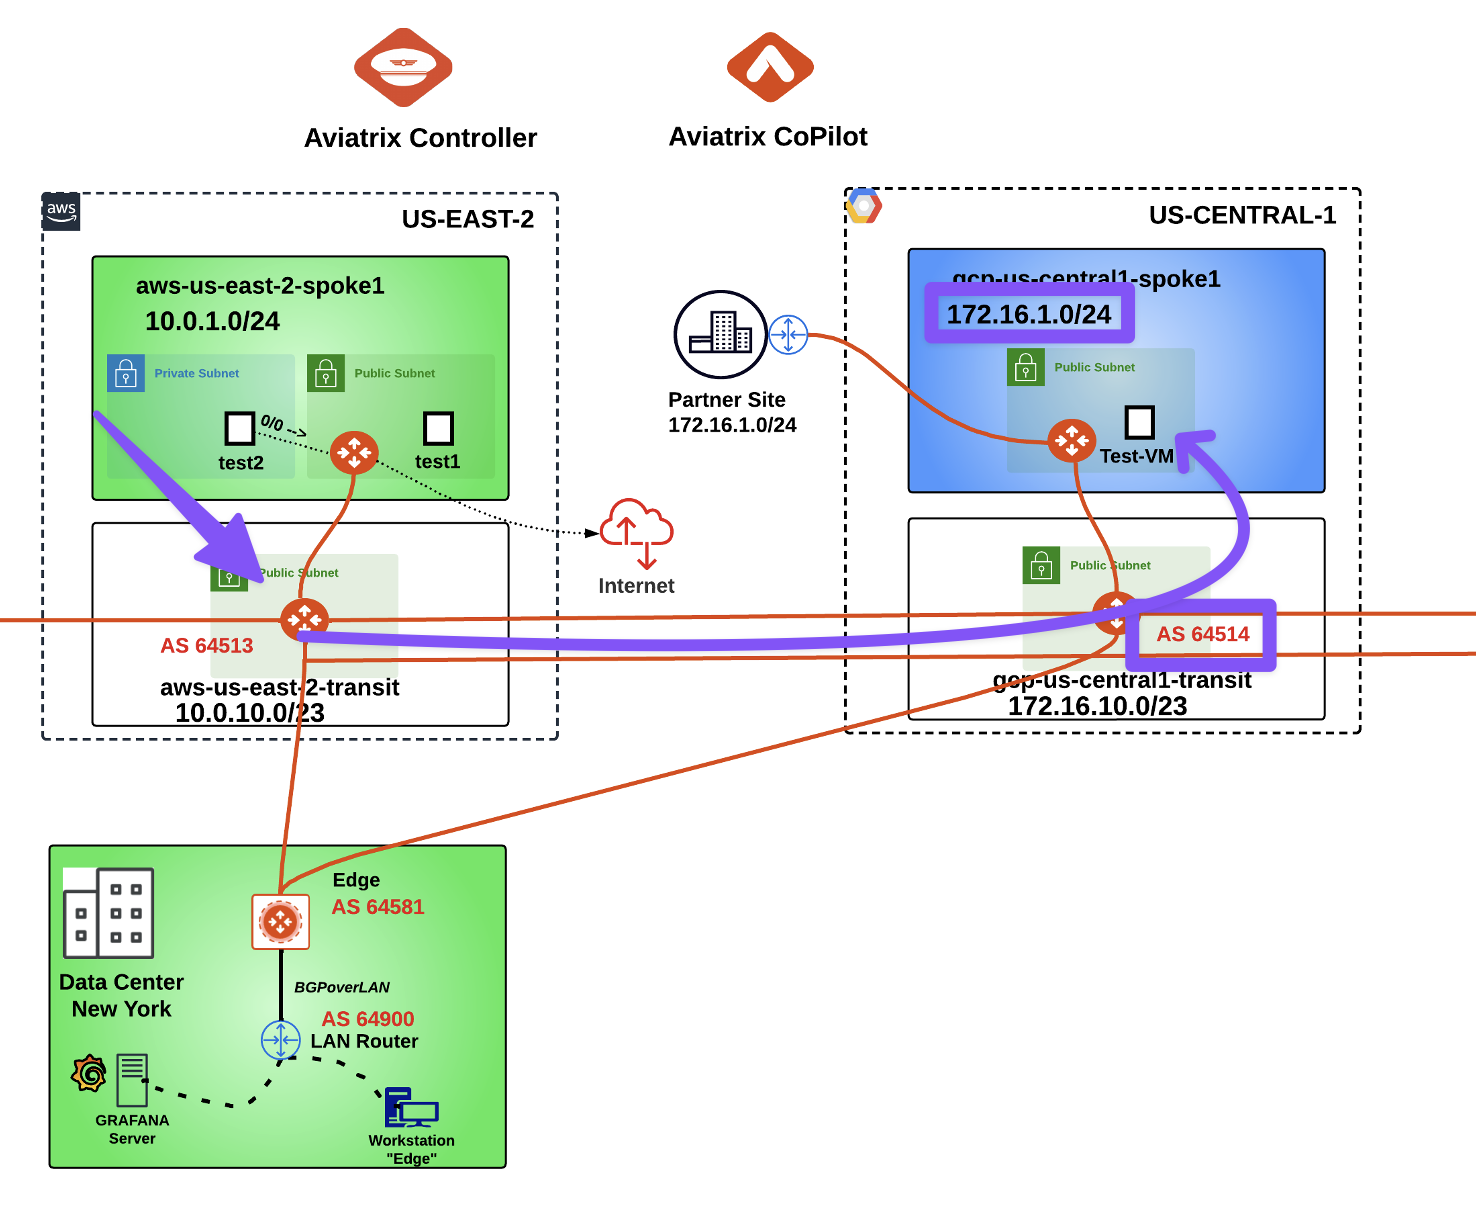
Fig. 298 1 AS Path length#
From the aws-us-east-2-transit perspective, the destination route 172.16.1.0 is far just one single AS (i.e. 64514)
Now let’s apply the route manipulation. Go to CoPilot > Cloud Fabric > Gateways > Transit Gateways and click on the aws-us-east-2-transit GW.
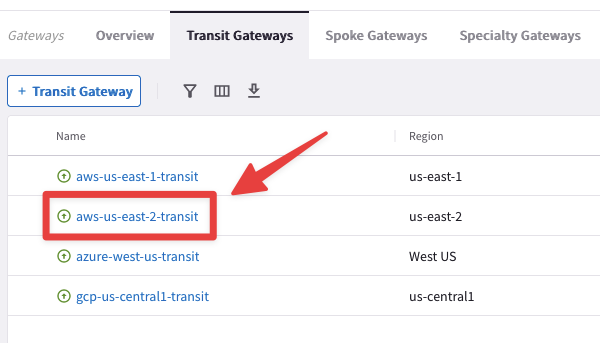
Fig. 299 aws-us-east-2-transit#
Select the "Settings" tab and then expand the "Border Gateway Protocol (BGP)" section, then under the AS Path Prepend widget, select the gcp-us-central1-transit-peering connection and type two times the AS number 64513.
Of course, then click on Save.
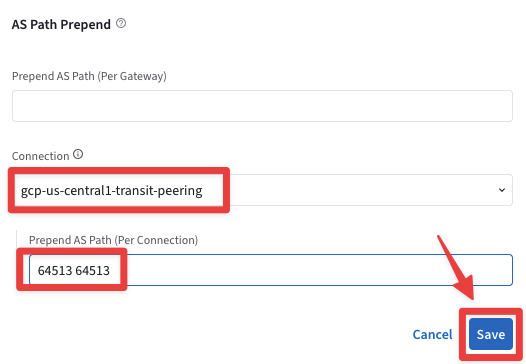
Fig. 300 as-path prepend#
Let’s repeat the same kind of configuration on the GCP Transit GW.
Go to CoPilot > Cloud fabric > Gateways > Transit Gateways and click on the gcp-us-central1-transit GW.
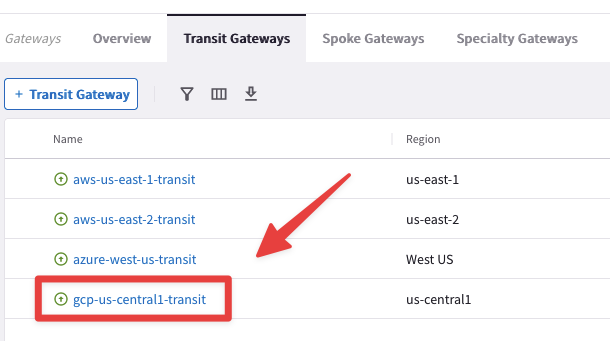
Fig. 301 gcp-us-central1-transit#
Select the "Settings" tab and then expand the "Border Gateway Protocol (BGP)" section, then under the AS Path Prepend widget select the aws-us-east-2-transit-peering connection and type two times the AS number 64514.
Click on Save to apply the change!
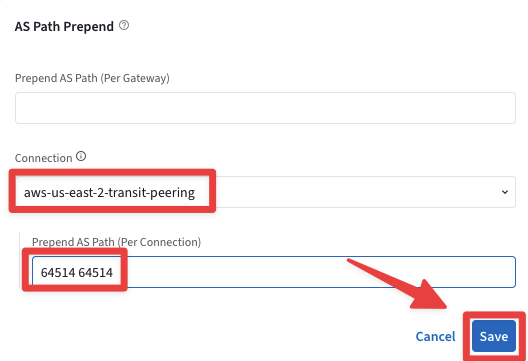
Fig. 302 as-path prepend#
Now go to CoPilot > Cloud Fabric > Gateways > Transit Gateways and click on the aws-us-east-2-transit GW, then select the "Route DB" tab and then once again, on the right-hand side, type 172.16.1.0/24 inside the Search field. This time the AS Path Length will turn out being equal to 3, due to to the route manipulation that harnessed the as-path prepend feature.

Fig. 303 As path length = 3#
Now, let’s launch again the traceroute towards 172.16.1.100 from the aws-us-east-2-spoke1-test1.

Fig. 304 traceroute#
The traceroute is still showing the Transit peering between AWS and GCP as the preferred path, although the as-path prepend was correctly applied earlier.
There is another option that needs to be enabled in order to complete this lab.
Go to CoPilot > Cloud Fabric > Hybrid Cloud > Edge Gateways and click on the Edge device.

Fig. 305 Edge#
Select the "Settings" Tab and then expand the "Routing" section, afterwards turn on the knob Transitive Routing and do not forget to click on Save.

Fig. 306 edge#
Let’s relaunch the traceroute towards 172.16.1.100 from the aws-us-east-2-spoke1-test1.

Fig. 307 traceroute#
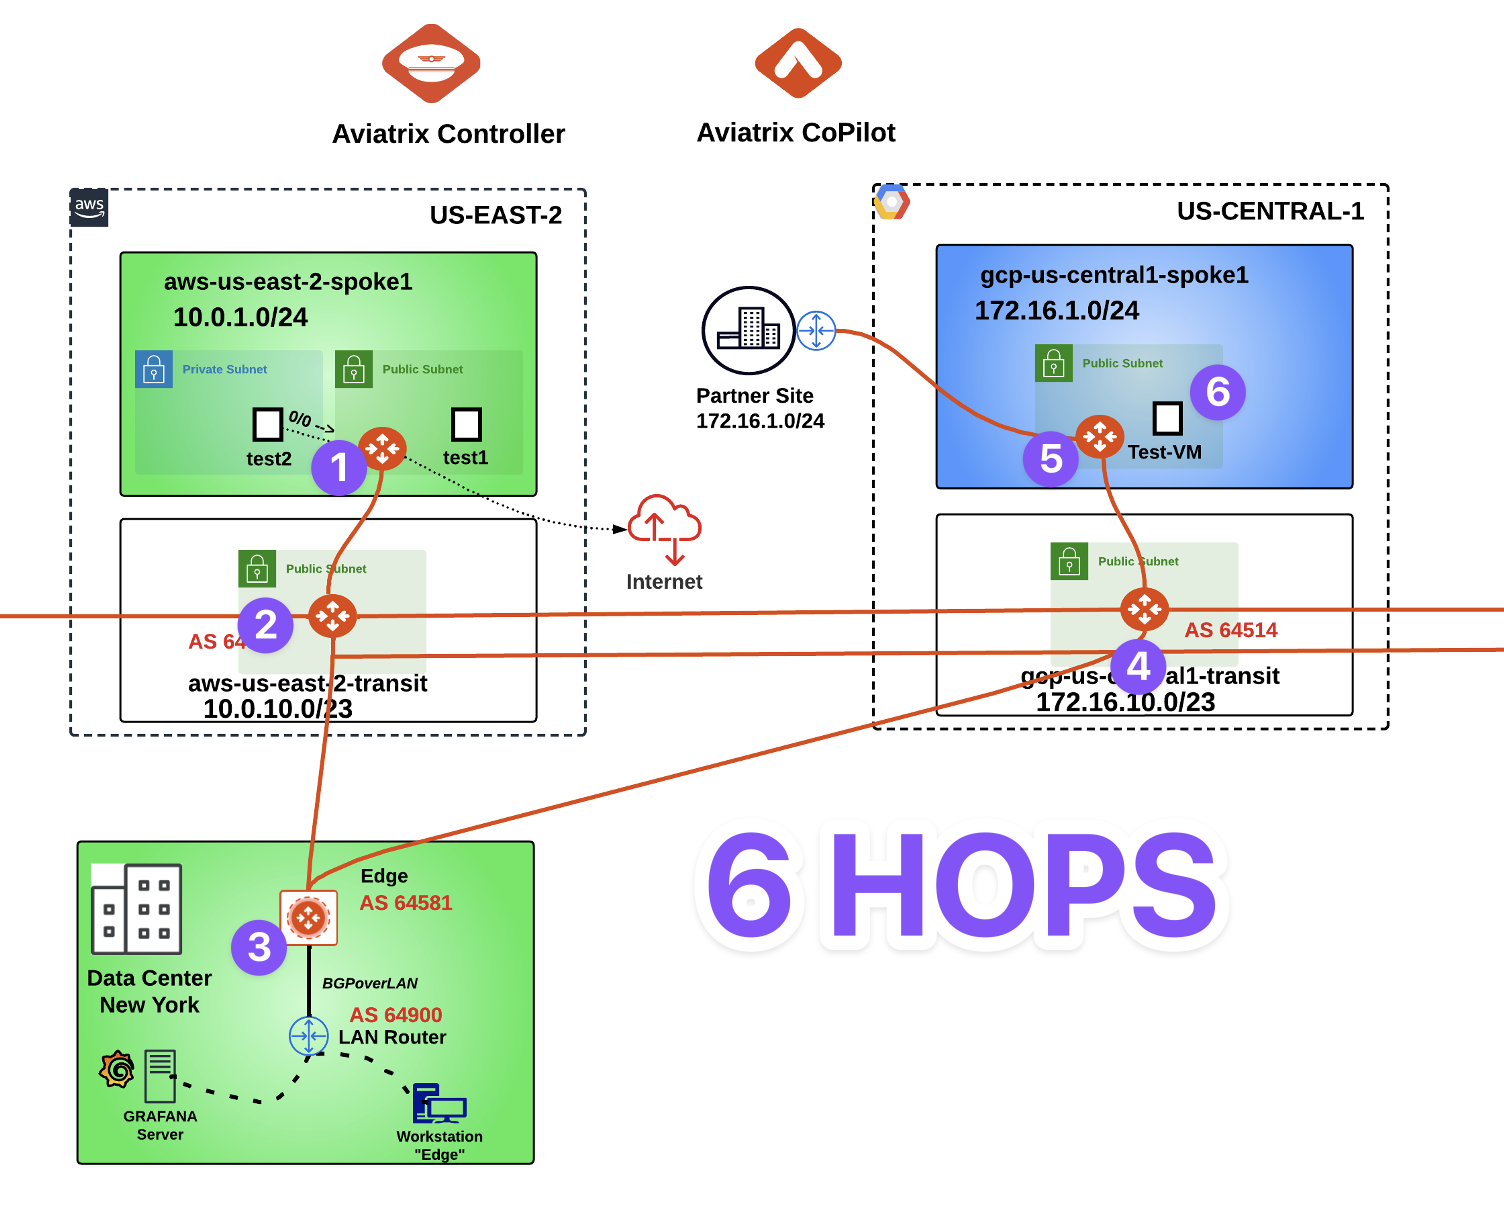
Fig. 308 6 Hops#
Now go back to CoPilot > Cloud Fabric > Gateways > Transit Gateways and click on the aws-us-east-2-transit GW, then select the "Route DB" tab and then once again, on the right-hand side, type 172.16.1.0 inside the Search field.
This time the AS Path Length will turn out being equal to 2.
The best path is via the Edge!

Fig. 309 As path length = 2#
After this lab, this is how the overall topology would look like:
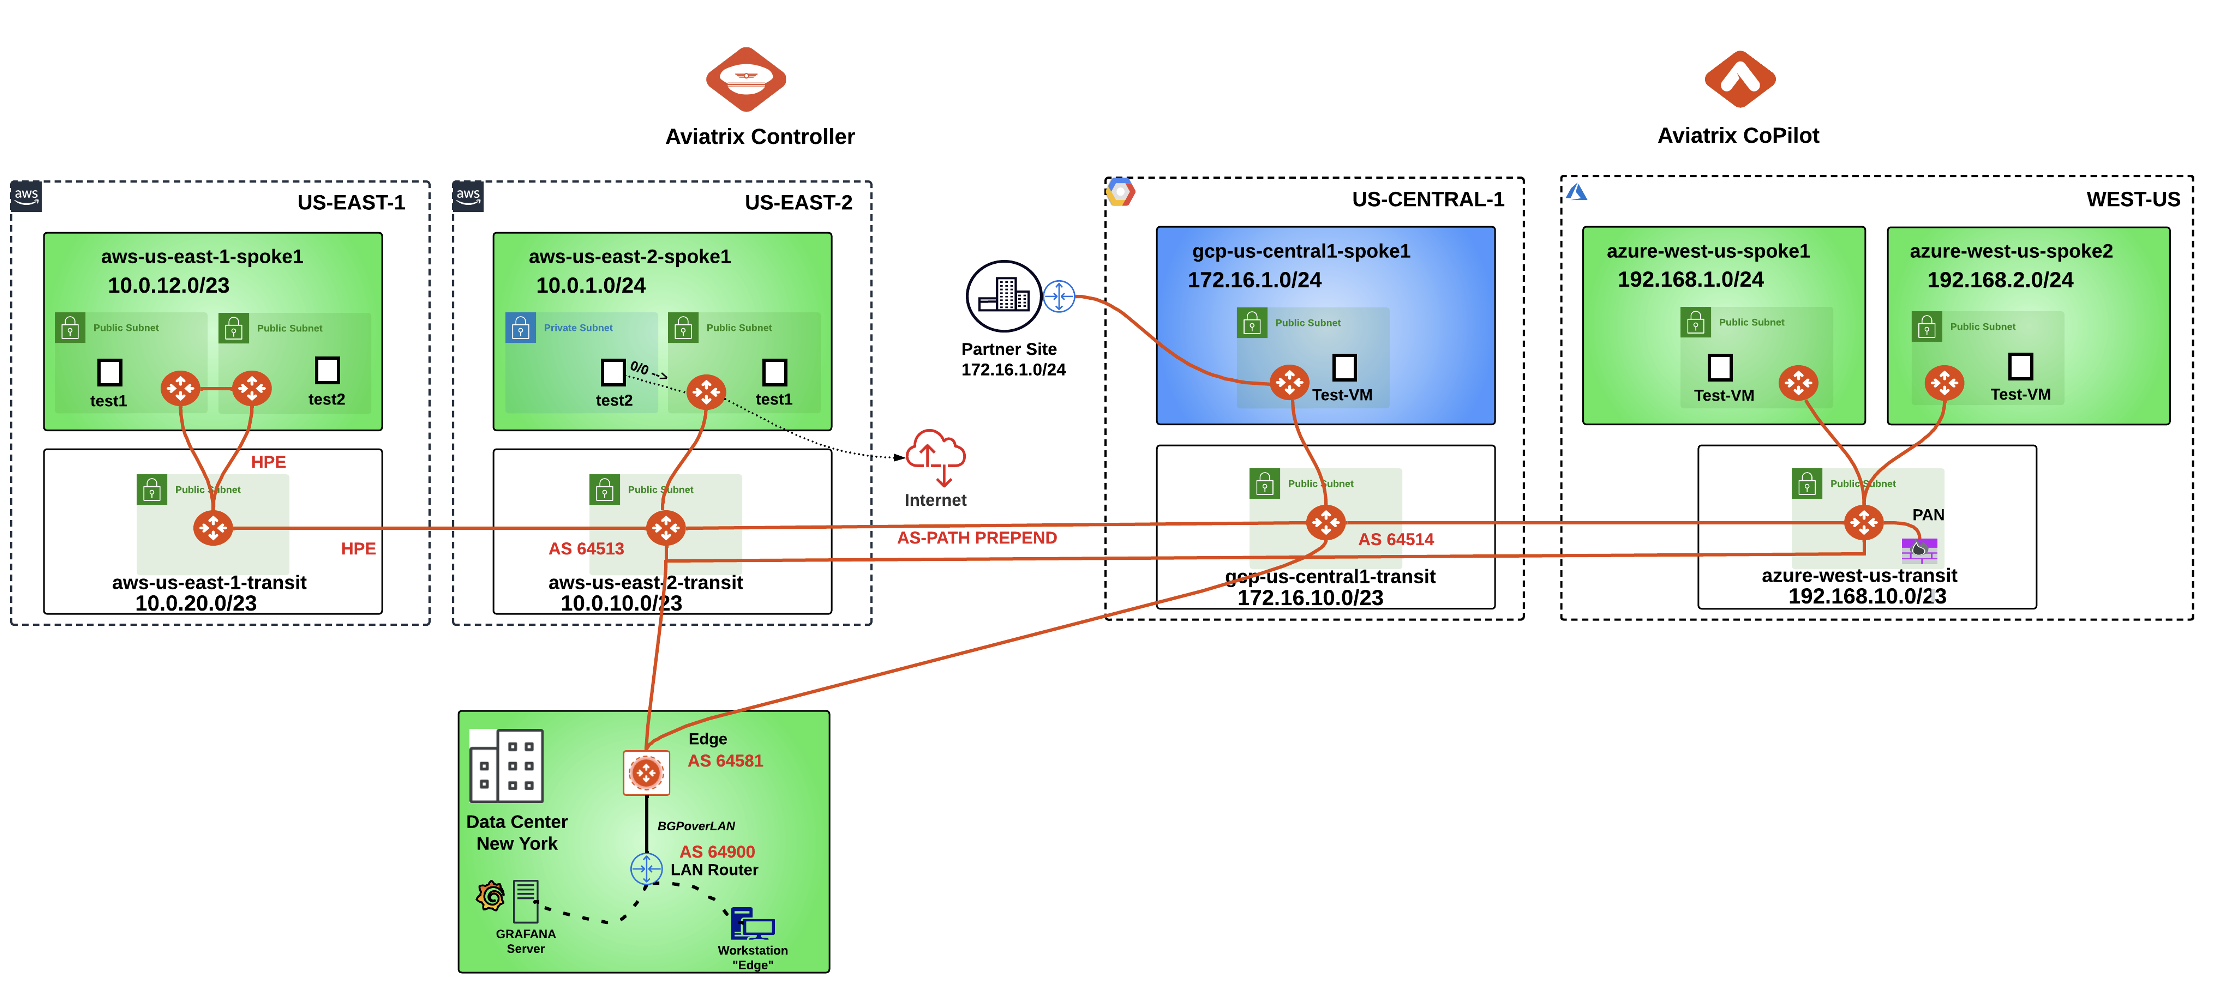
Fig. 310 Final Topology for Lab 8#
